Checking the polarity of your speakers may sound like a technical task, but it’s an important part of setting up any audio system—whether you’re a music lover, a home theater enthusiast, or just want your radio to sound right. Getting the polarity right means your speakers push and pull air in sync, creating clear and powerful sound. If you get it wrong, you can lose bass, clarity, and even damage your equipment in the long run. One of the most reliable tools for this task is a multimeter. Used properly, it can quickly tell you which wire is positive and which is negative, helping you avoid costly mistakes.
In this article, you’ll discover how to check speaker polarity with a multimeter, why it matters, and how to avoid common pitfalls. You’ll learn the different methods, what to do if your speaker wires are not labeled, and how to handle challenging cases like old or custom speakers.
We’ll also explore some common misconceptions about speaker polarity, and provide practical tips based on real-world experience. By the end, you’ll be able to confidently set up your own system, knowing your speakers are wired for the best possible sound.
Why Speaker Polarity Matters
Many people set up speakers without thinking about polarity. But even a small mistake here can have a big impact. Speaker polarity refers to which wire connects to the positive (+) and negative (–) terminals on both your amplifier/receiver and your speaker. If both speakers are wired the same way, their drivers move in unison. If one is reversed, the speakers work against each other, leading to out-of-phase sound.
When speakers are out of phase:
- Bass sounds weak or disappears because sound waves cancel each other.
- Stereo imaging becomes unclear.
- The overall sound feels thin or “hollow.”
Correct polarity ensures your speakers deliver the full range of frequencies and a strong stereo effect. In cars, home theaters, and even basic radios, getting this right makes music and movies sound the way they should.
Understanding Speaker Wires And Terminals
Before using a multimeter, you need to know what you’re working with. Most speakers have two wires: positive (red) and negative (black). Sometimes, wires are color-coded, but not always—especially with older or custom cables. The terminals on speakers and amplifiers usually have similar markings.
Common Types Of Speaker Wires
- Color-coded wire: One wire is marked with a red stripe or writing (positive), the other is plain (negative).
- Plain wire: Both wires look the same—no colors, stripes, or writing.
- Banana plugs/spade connectors: Terminals are clearly labeled, making connections easier.
- Spring clip/binding post terminals: Found on most modern speakers and receivers.
If your wires aren’t marked, or you’re unsure, a multimeter helps you identify which is which.
What Is A Multimeter And Why Use It?
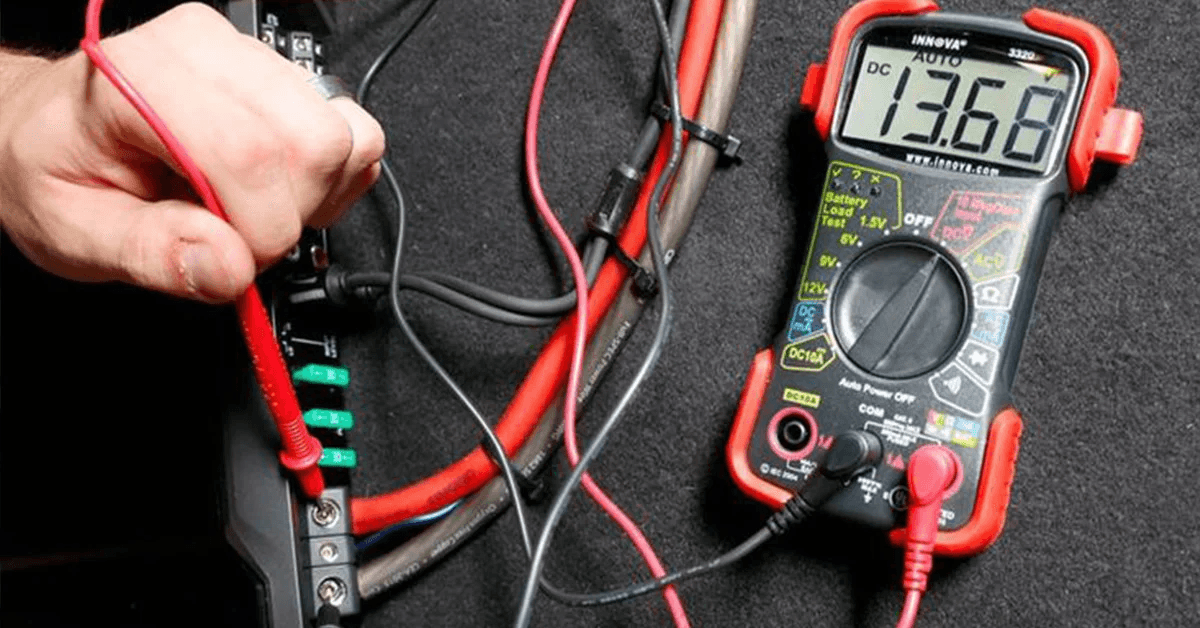
A multimeter is a small device that measures electrical values like voltage, resistance, and current. For checking polarity, you’ll use the multimeter’s continuity or resistance (ohms) setting. This tells you if electricity can flow between two points—a handy way to match wires from one end to the other.
Using a multimeter is more accurate than guessing or using “speaker pop” tests (where you touch the wires to a battery). It’s safer, prevents mistakes, and works even for complex setups.
Features Of A Good Multimeter For This Task
- Digital display for clear readings
- Continuity mode (audible beep when the circuit is complete)
- Resistance mode (measures in ohms)
- Probes with fine tips for precise contact
Even a basic multimeter under $20 is enough for most users.
Step-by-step: How To Check Speaker Polarity With A Multimeter
This section gives a detailed walkthrough. Take your time—accuracy here means better sound later.
1. Prepare Your Tools And Work Area
- Turn off your amplifier or receiver.
- Disconnect the speaker wires from the amplifier/receiver.
- Make sure your multimeter is working and set to the correct mode (continuity or resistance).
- If possible, label each wire at both ends for clarity.
2. Identify Wires At Both Ends
If wires are marked, note which is positive and which is negative. If not, continue to the next steps.
3. Set Your Multimeter
- For most checks, use continuity mode (the symbol looks like a sound wave or diode).
- If your multimeter has no continuity mode, use the resistance (ohms) setting.
4. Check Continuity
Hold one probe to a wire at the speaker end, and the other probe to the same wire at the amplifier end.
- If the multimeter beeps, or shows a near-zero resistance, you have continuity—both probes are on the same wire.
- Repeat for the other wire.
Tip: On some systems, you may have to remove a bit of insulation from the wire to make good contact.
5. Label The Wires
As you identify each wire, label one as positive (+) and the other as negative (–). Use tape or a marker for future reference.
6. Connect To The Terminals
Attach the positive wire to the red terminal (on both the speaker and the amplifier/receiver), and the negative wire to the black terminal.
7. Double-check Your Work
Repeat the process for each speaker. Mistakes on even one speaker can affect the whole system.
8. Power Up And Test
Turn on your amplifier/receiver. Play music with clear bass and check for strong, centered sound.

Credit: www.ifixit.com
Visual Guide: Speaker Polarity Testing With A Multimeter
Let’s compare the two main multimeter settings you can use for this task.
| Setting | Symbol | What It Does | Best For |
|---|---|---|---|
| Continuity | Sound wave/diode | Beeps if circuit is complete | Simple wire tracing |
| Resistance (Ohms) | Ω | Shows numerical value (should be near zero for continuity) | Detailed checks, old wires |
Many beginners miss that resistance readings may not be exactly zero—even on good wires—because of wire length and probe contact. As a rule, anything under 2 ohms is a good sign for speaker wire.
Common Polarity Problems And How To Fix Them
Wires With No Markings
It’s common to find wires with no colors or stripes. In this case, your multimeter is the only reliable way to trace each wire end-to-end and label them.
Multiple Speakers
When wiring multiple speakers, it’s easy to mix up connections. Label each wire as you go, and check polarity for every speaker.
Custom Or Old Speakers
Vintage speakers or DIY setups may use unusual wiring. Always test every connection—even if you think you know which is which.
Reversed Polarity
If you notice weak bass or poor stereo imaging after setup, double-check your connections with the multimeter. Reversed polarity is a common cause.
Speaker Polarity Testing: Battery Pop Test Vs. Multimeter Method
Some guides suggest the “battery pop test”—briefly touching a 1. 5V battery to the speaker wires and watching which way the cone moves. While this can work, it’s less precise and can damage delicate speakers.
Here’s a quick comparison of the two methods:
| Method | Accuracy | Risk of Damage | Best Use |
|---|---|---|---|
| Multimeter | High | Very Low | Modern speakers, critical setups |
| Battery Pop | Medium | Medium/High | Quick checks on robust speakers |
Insight: The multimeter method is safer for all speakers and gives you a clear, repeatable result.
Tips For Accurate Polarity Testing
- Use fresh batteries in your multimeter to avoid false readings.
- Make firm contact with probes—dirty or oxidized wires can give incorrect results.
- Test all wires at once if you have a multi-channel system. Label as you go.
- Avoid touching probe tips together during measurement, as your body can conduct small currents and affect the reading.
- If your multimeter shows no reading at all, check for broken wires or loose connections.
Advanced Scenarios: Dealing With Complex Speaker Setups
Bi-wired And Bi-amped Speakers
Some high-end speakers have two sets of terminals (“bi-wiring”). Use your multimeter to ensure both sets are connected in the same polarity. This is crucial for maintaining phase and optimal sound.
In-wall And Ceiling Speakers
With in-wall or ceiling speakers, wires may be hidden. Label both ends during installation, and always check with a multimeter before sealing walls.
Car Audio Systems
Automotive speakers often have non-standard colors. Use the multimeter to trace each wire from the head unit to each speaker. Car manufacturers sometimes reverse wires, so double-check each connection.
Why You Shouldn’t Rely On Color Alone
It’s tempting to trust wire color, but not all manufacturers follow the same standards. Even professionals sometimes find red wires connected to negative, or black to positive, especially in older or custom installations.
Practical example: You buy used speakers at a garage sale, and the wires are not marked. If you connect them “by eye,” you may accidentally reverse the polarity, leading to poor sound.
Expert tip: Always test with a multimeter, no matter how obvious the colors seem.
Credit: www.hollyland.com
How Incorrect Polarity Affects Sound
Polarity errors are not always obvious to the untrained ear. Here’s what to listen for:
- Bass disappears or sounds weak.
- Vocals seem “off-center” or lack focus.
- Instruments that should be centered (like a kick drum) feel spread out or “hollow.”
- The soundstage feels flat, and stereo effects are less clear.
If you notice any of these, check your connections with a multimeter.
Real-world Example: Fixing A Home Theater System
Consider a user who recently upgraded their home theater. After connecting everything, they noticed movies sounded thin, and music lacked bass. Using a multimeter, they found one speaker wire was reversed. After correcting it, the sound improved immediately. This example shows why it’s worth double-checking every connection.
Speaker Polarity And Multi-room Audio
In larger homes or businesses, multi-room audio systems are popular. Here, polarity errors can be even harder to spot, since the sound comes from many locations. Test every speaker wire with a multimeter before finalizing the installation. This ensures consistent, high-quality sound in every room.
Multimeter Buying Guide For Speaker Testing
If you don’t own a multimeter, here’s what to look for:
| Feature | Why It Matters |
|---|---|
| Continuity Mode (Beep) | Makes wire tracing fast and easy |
| Clear Digital Display | Easy to read, even for beginners |
| Auto-ranging | No need to set the measurement range manually |
| Durable Probes | Stays accurate after many uses |
| Low Price ($15–$30) | Affordable for most users |
Even basic models from hardware stores or online retailers are suitable for speaker polarity tests.
Essential Safety Tips
- Always turn off your amplifier or receiver before disconnecting or testing wires.
- Never test live wires (connected to powered equipment) with the multimeter’s continuity or resistance mode.
- Avoid shorting wires together while testing, as this can damage your amplifier.
- Work in a well-lit area to avoid mistakes.
- If unsure, ask for help—a small error in wiring can cause big problems.
What Beginners Often Miss
Two common mistakes:
- Testing only one speaker: Even if one speaker is correct, others may not be. Test every wire.
- Not labeling wires after testing: Once you identify polarity, always mark the wires. This saves time if you move or upgrade your system later.
Troubleshooting: If Your Multimeter Shows No Reading
If you get no beep or a very high resistance reading:
- Check for broken wires inside the insulation.
- Make sure probes touch bare wire, not plastic.
- Try testing with the probes reversed.
- Replace multimeter batteries or try a different multimeter.
If the problem persists, your speaker wire may need replacing.
When To Call A Professional
If you’re working with expensive, built-in, or complex systems and feel unsure, consider hiring a professional installer. They have advanced tools and experience to ensure your system is set up perfectly.
Additional Resources
For more detailed guides and diagrams, consider checking the official guide from Wikipedia on speaker polarity.
Frequently Asked Questions
How Do I Know If My Speakers Are Out Of Phase?
If your speakers are out of phase, you’ll notice weak bass, unclear stereo imaging, and a hollow sound. Music may feel less powerful, and vocals might not seem centered. Testing with a multimeter ensures correct polarity.
Can I Use A Multimeter On Powered (active) Speakers?
Do not use a multimeter on live, powered speakers. Always disconnect power before testing. For active speakers, test the cables before connecting them to the speaker.
What Happens If Speaker Polarity Is Reversed?
Reversed polarity causes speakers to push and pull out of sync. This results in poor bass, unclear sound, and a weak stereo effect. It won’t damage most speakers, but it does harm sound quality.
Is There A Difference Between Using Analog And Digital Multimeters?
Both types work for polarity testing. Digital multimeters are easier to read and usually have a beep for continuity. Analog models require watching the needle for movement, which can be less precise.
How Often Should I Check Speaker Polarity?
Check every time you install new speakers, move equipment, or notice changes in sound quality. Even a single reversed wire can affect your whole system.
Getting speaker polarity right with a multimeter is a simple skill that pays off with better sound and fewer headaches. Take your time, label everything, and enjoy your music and movies the way they were meant to be heard.

Credit: www.youtube.com