Checking your trailer lights isn’t just about safety—it’s about avoiding fines, preventing accidents, and making sure your trip goes smoothly. Many people only notice trailer light problems after dark, or when someone else points them out. But with a simple tool like a multimeter, you can test your trailer lights before you hit the road. This guide will walk you through everything you need to know, even if you’ve never used a multimeter before.
You’ll learn why trailer light checks matter, what tools you need, exactly how to test each light circuit, and how to fix problems you find. By the end, you’ll feel confident diagnosing trailer light issues yourself, saving time and possibly money.
Let’s get started with the basics and then dig deeper.
Why Checking Trailer Lights Is Important
Most drivers understand that working lights are required by law. But there’s more to it:
- Safety: Trailer lights signal your intentions to other drivers. Broken lights can cause rear-end collisions or confusion.
- Legal reasons: In many countries, non-working trailer lights can lead to tickets or failed vehicle inspections.
- Insurance: Some insurance policies may not cover accidents if your trailer lights weren’t working.
- Cost: Fixing problems before you drive is usually cheaper and easier than dealing with accidents or roadside repairs.
A working light system keeps you, your cargo, and others safer on the road.
Understanding Trailer Light Systems
Before you test anything, it helps to understand how trailer lights are set up. Most trailer lighting systems have these main circuits:
- Tail lights (for night visibility)
- Brake lights
- Left and right turn signals
- Reverse lights (on some trailers)
- Side marker lights (sometimes)
Each circuit gets power from the tow vehicle through a wiring harness and plug, usually at the back bumper. Common trailer connectors include 4-pin, 5-pin, 6-pin, and 7-pin types. Each pin carries power for a different function.
Most problems come from wiring faults, dirty connectors, or blown bulbs. That’s why a multimeter is so useful—it tells you exactly where power is (or isn’t) flowing.
Credit: www.truckspring.com
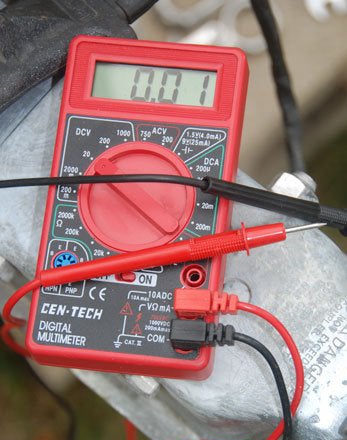
What Is A Multimeter And Why Use It?
A multimeter is a handheld tool that measures electrical properties like voltage, resistance, and current. For trailer light testing, you mainly use it to measure voltage and continuity.
Why use a multimeter instead of just replacing bulbs or fuses? Because electrical problems are not always obvious. A wire may look fine but be broken inside, or a connector may have invisible corrosion. A multimeter finds hidden problems quickly.
Tools And Equipment You’ll Need
Gather these items before starting:
- Digital multimeter (with probes)
- Screwdriver set (for opening light housings)
- Wire brush or sandpaper (for cleaning contacts)
- Spare bulbs (in case you find a burnt one)
- Trailer wiring diagram (for your connector type)
- Test leads or alligator clips (optional, for easier probing)
- Electrical tape (for repairs)
- Gloves (for safety)
If you’re not sure about your trailer’s wiring, look for a sticker near the plug or check your owner’s manual.
Safety First: Precautions Before Testing
Before using a multimeter on your trailer, keep these safety tips in mind:
- Make sure the trailer is not connected to the vehicle battery unless you’re testing with the vehicle powered on.
- Wear gloves to avoid sharp wires or hot bulbs.
- Work in a well-lit area.
- If you’re testing with the vehicle, put it in park, apply the parking brake, and turn off the ignition when connecting wires.
- Double-check your multimeter settings before touching any wires.
Understanding Your Trailer Plug: Pinouts And Wiring Colors
You need to know which wire does what. Here’s an example for a common 4-pin flat trailer connector:
| Pin Number | Wire Color | Function |
|---|---|---|
| 1 | White | Ground |
| 2 | Brown | Tail/running lights |
| 3 | Yellow | Left turn/brake |
| 4 | Green | Right turn/brake |
Other connectors (like 7-pin round) have more functions and different colors. Always confirm with your trailer’s manual.
Step-by-step: How To Check Trailer Lights With A Multimeter
Here’s a practical guide for beginners and experienced users alike.
1. Inspect The Plug And Wiring
Start with a basic visual check:
- Look for broken, loose, or corroded pins on the trailer plug.
- Check for cracked wires or exposed metal.
- Clean any dirt or rust with a wire brush.
This step often reveals obvious problems—don’t skip it.
2. Set Up Your Multimeter
- Turn your multimeter on.
- For voltage testing, set it to DC Volts (often a “V” symbol with straight lines).
- For continuity testing, set it to the continuity or resistance (Ω) setting. On most meters, continuity makes a beep if the circuit is complete.
Double-check your probes are in the right sockets: COM (common, usually black) and VΩmA (red).
3. Check For Power At The Trailer Plug
With your trailer and tow vehicle connected, test for voltage at the trailer plug:
- Turn on the vehicle’s lights (or the function you want to test).
- Insert the black probe into the ground pin.
- Touch the red probe to the pin for the circuit you’re testing (for example, the tail light pin).
- You should see about 12 volts (for most vehicles). If not, there’s a wiring or fuse problem.
Repeat for each function: tail lights, left turn, right turn, and brake.
4. Testing Continuity Through The Trailer Wiring
If you find no voltage at the plug, unplug the trailer and test the wiring itself:
- Set your multimeter to continuity.
- Place one probe on the pin at the plug and the other at the light socket (with the bulb removed).
- A beep (or a reading near zero ohms) means the wire is good.
- No beep means the wire is broken or disconnected.
This helps you find bad wires, even if they look fine from the outside.
5. Test The Ground Connection
A bad ground is a very common trailer light issue. Here’s how to check:
- Set the meter to continuity.
- Touch one probe to the trailer’s ground pin and the other to the trailer frame (bare metal).
- You should get a beep or low resistance.
- If not, clean the connection point and retest.
A weak ground can cause lights to flicker, glow dim, or not work at all.
6. Check Each Light Socket
To make sure each light socket is getting power:
- With the vehicle’s lights on, set the multimeter to DC Volts.
- Touch the black probe to a good ground (trailer frame).
- Touch the red probe inside the socket terminal.
- You should see around 12 volts when the circuit is on.
- If not, trace back to the wiring and test for breaks.
If there is voltage but the bulb doesn’t light, the socket may be dirty or corroded.
7. Test The Bulbs
Sometimes the problem is just a burnt bulb. Here’s how to check with a multimeter:
- Remove the bulb.
- Set the meter to continuity or lowest resistance.
- Touch the probes to the bulb’s contacts.
- A beep or low resistance means the bulb is good; no beep means it’s burnt out.
Replace any failed bulbs and test again.
Common Problems And How To Fix Them
While testing, you may find these issues:
- No voltage at the plug: Check fuses, relays, and wiring in the tow vehicle.
- No continuity in a wire: The wire may be broken inside the insulation. Replace or repair the section.
- Bad ground: Clean the ground point and reattach the wire tightly.
- Dim or flickering lights: Usually caused by corrosion or a weak ground. Clean sockets and plugs.
- Multiple lights not working: Check the trailer plug for bent or corroded pins.
Example: Testing A Left Turn Signal Circuit
Let’s say your left turn signal isn’t working. Here’s a step-by-step approach:
- Turn on the left turn signal in your vehicle.
- Test the trailer plug’s left turn pin for 12 volts.
- If no voltage, check the vehicle’s fuse and wiring.
- If voltage is present, plug in the trailer and test for voltage at the left tail light socket.
- If the socket has power, test the bulb with the multimeter.
- If the bulb is good but the light doesn’t work, clean the socket and check the ground.
By following the circuit, you quickly find where the problem is.
Comparing Troubleshooting Methods
Not sure if you should use a multimeter, test light, or just replace bulbs? Here’s a comparison:
| Method | Pros | Cons |
|---|---|---|
| Multimeter | Accurate, can test voltage and continuity, finds hidden problems | Needs some practice, more steps |
| Test Light | Simple, quick for voltage check | Can’t check continuity, less precise |
| Replace Bulbs | Easy, sometimes solves the problem | Doesn’t help if wiring or ground is bad |
A multimeter covers all bases, while other methods are more limited.

Credit: www.wikihow.com
Practical Tips For Accurate Testing
- Always check both the vehicle and trailer sides if you find a fault.
- If you test voltage but get a reading lower than 12 volts (for a 12V system), that could mean a poor connection or corroded wire.
- Clean all contacts before retesting. Corrosion is a common cause of trailer light problems.
- Don’t forget side marker and reverse lights if your trailer has them. They can also fail due to wiring issues.
- If you use a multimeter for the first time, practice on a known good circuit before testing your trailer.
Non-obvious Insights Beginners Miss
- Ground wires are critical: Many people focus only on the “hot” wires (those carrying power). But a poor ground can make all the trailer lights act strange. Always check and clean ground connections.
- Wiggle test: Sometimes wires are broken inside the insulation and only fail when moved. While testing continuity, gently wiggle the wire and see if the reading changes.
- Voltage drop: If you measure 12 volts at the plug but less at the light, you may have a high-resistance connection (often from corrosion or a weak splice).
- Vehicle fuses: If none of the trailer lights work, check the tow vehicle’s dedicated trailer lighting fuses. Many cars and trucks have a separate fuse box for trailer wiring.
Maintaining Your Trailer Lighting System
Testing is just one part of trailer light care. Regular maintenance helps prevent problems:
- Clean plug pins with a wire brush and apply dielectric grease to prevent corrosion.
- Check wires for wear or damage every few months, especially before long trips.
- Replace cracked or brittle wiring—old wires can break inside without showing from the outside.
- Store your trailer plug off the ground and covered when not in use.
- After launching a boat trailer, rinse off any saltwater that can corrode electrical parts.
When To Call A Professional
If you’ve followed all the steps above and still have problems, it may be time to call an expert. Signs you need help:
- Wiring is melted, burned, or shorting out.
- You’re not comfortable working with electrical tools.
- Your trailer has complex electronics (like electric brakes or backup sensors).
Professional trailer shops have advanced test tools and can diagnose even tricky problems quickly.
Real-world Example: Diagnosing A Flickering Tail Light
Imagine you’re towing a small boat trailer, and a friend tells you your tail light flickers when you hit bumps.
- You test the bulb—it’s fine.
- You check voltage at the socket—it’s normal when parked.
- You do a wiggle test on the wiring and see the voltage drop or disappear when you move the wires near the frame.
- You find a pinched wire that is only making contact sometimes.
By repairing the wire and securing it, you stop the flicker for good.
Upgrading Trailer Lighting: Led Vs. Incandescent
Many trailers now use LED lights instead of old-style bulbs. Here’s a quick comparison:
| Type | Pros | Cons |
|---|---|---|
| LED | Long life, low power, bright, handle vibration better | More expensive, sometimes need special wiring or adapters |
| Incandescent | Cheaper, easy to replace | Burn out faster, sensitive to vibration, use more power |
If you switch to LED, make sure your wiring and plug are in good shape. Bad wiring can still cause problems, even with new lights.
For more about trailer wiring standards and troubleshooting, check the official Traillink resource.

Credit: www.youtube.com
Frequently Asked Questions
What Setting Should My Multimeter Be On To Test Trailer Lights?
Set your multimeter to DC Volts (often marked as “V” with a straight line and dashed lines) when checking for power. For checking wires or bulbs, use the continuity or ohms (Ω) setting.
How Do I Know If My Trailer Has A Bad Ground?
If all the lights flicker, work only sometimes, or glow dim, you may have a bad ground. Test with your multimeter set to continuity between the ground wire/pin and the trailer frame. No beep or high resistance means the ground connection is bad.
Can I Test Trailer Lights Without The Tow Vehicle?
You can test the trailer wiring and bulbs for continuity with a multimeter even if the tow vehicle isn’t present. But to check for voltage, you’ll need a 12V battery or the tow vehicle to power the circuits.
Why Do All My Trailer Lights Work Except One?
This usually means there’s a problem with that specific light’s wire, socket, or bulb. Use your multimeter to check for voltage at the socket and continuity in the wire. Don’t forget to check the ground wire for that light.
Is It Worth Buying A Multimeter Just For Trailer Lights?
A basic digital multimeter is inexpensive and useful for many vehicle and home electrical jobs—not just trailer lights. It can save you time and guesswork compared to only swapping bulbs or fuses.
Checking trailer lights with a multimeter may feel technical at first, but with these steps, anyone can do it safely and correctly. Regular testing ensures your trips are legal, safe, and free from surprise electrical problems. Whether you’re new to towing or a seasoned hauler, mastering the multimeter is a skill that pays off on every journey.