If your car is making strange noises or running rough, your knock sensor might be the culprit. Knowing how to test a knock sensor with a multimeter can save you time and money by pinpointing the issue yourself.
In this guide, you’ll learn simple, step-by-step methods to check your knock sensor’s health quickly and accurately. Keep reading, and you’ll soon gain the confidence to diagnose this essential part of your engine before costly repairs become necessary.
Tools Needed
Testing a knock sensor requires the right tools. Having the proper equipment makes the process smooth and accurate. Here is what you need to check a knock sensor using a multimeter.
Multimeter Basics
A multimeter measures electrical values like voltage and resistance. Choose a digital multimeter for clear readings. It should have a setting for ohms to test resistance. The probes must be in good condition for accurate results. Knowing how to set the multimeter is essential before testing.
Additional Equipment
You also need a wrench or socket set to remove the knock sensor. A flashlight helps to see the sensor clearly in tight spaces. Safety gloves protect your hands while working near the engine. Keep a notebook or phone handy to record your readings for comparison.
Credit: www.nevsemi.com
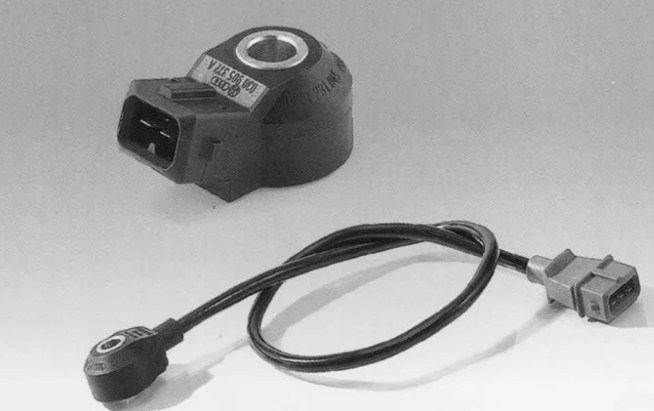
Locate The Knock Sensor
To test a knock sensor with a multimeter, first find the sensor on your engine. The knock sensor detects unusual vibrations or knocking sounds in the engine. Locating it correctly makes the testing process easier and more accurate.
Common Sensor Locations
The knock sensor usually sits on the engine block, cylinder head, or intake manifold. Different car models place it in different spots. Look near the engine’s center or sides. It is often a small, round part with a wire connector attached. Check the vehicle manual for exact locations if available.
Accessing The Sensor
Accessing the knock sensor may require removing engine covers or other parts. Use basic tools like screwdrivers or wrenches to clear the area. Be careful not to damage wires or connectors. A flashlight helps to see tight spaces. Take your time to avoid mistakes.
Prepare For Testing
Preparing to test a knock sensor with a multimeter is essential. It sets the stage for accurate results and safe handling. This stage involves understanding safety rules and correctly setting up the multimeter.
Safety Precautions
Start by turning off the vehicle’s engine and disconnecting the battery. This prevents electrical shocks and accidental short circuits. Wear safety gloves to protect your hands from sharp parts. Avoid loose clothing that could get caught in engine components. Work in a well-lit area to see clearly. Keep a fire extinguisher nearby as a safety measure.
Setting Up The Multimeter
Choose a digital multimeter for better accuracy. Set it to measure resistance, usually marked as “Ω”. Check the multimeter’s battery before use to ensure it works well. Attach the probes firmly to the multimeter. Connect the black probe to the common (COM) port. Connect the red probe to the voltage or resistance port. Test the multimeter on a known resistor to verify it shows correct readings. This step helps avoid errors during knock sensor testing.
Credit: www.tomorrowstechnician.com
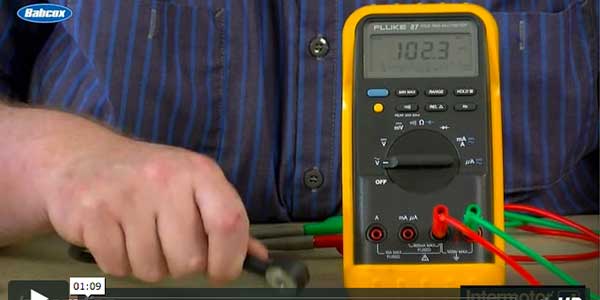
Perform Resistance Test
Performing a resistance test on a knock sensor helps check its health. This test shows if the sensor’s internal circuit is working right. You need a multimeter for this task. The multimeter measures electrical resistance inside the sensor.
Testing resistance is simple and quick. It helps spot problems before they get worse. Follow the steps carefully to avoid mistakes. Always keep safety in mind while handling vehicle parts.
Disconnecting The Sensor
First, turn off the vehicle’s engine. Locate the knock sensor on the engine block. It usually has a wire connector attached to it. Gently unplug the connector from the sensor. Do not pull the wires; pull the connector only.
Check the sensor for dirt or damage. Clean the area if needed. This step ensures accurate resistance readings. Make sure the sensor is completely disconnected before testing.
Measuring Resistance Values
Set your multimeter to the ohms (Ω) setting. Place the multimeter probes on the sensor terminals. It does not matter which probe goes on which terminal. Read the resistance value shown on the multimeter display.
Compare the reading with the sensor’s specified resistance range. This information is usually in the vehicle manual. A normal knock sensor has resistance between 500 and 6000 ohms. Values outside this range mean the sensor might be faulty.
Repeat the test a few times to confirm the reading. If the sensor shows no resistance or infinite resistance, it needs replacement. Proper resistance ensures the sensor sends correct signals to the engine control unit.
Perform Voltage Test
The voltage test is a key step in checking a knock sensor with a multimeter. This test helps you find out if the sensor gets the right power and sends signals correctly. A good voltage reading means the sensor works well. A bad reading shows a problem that needs fixing.
Follow the steps carefully to avoid mistakes. The goal is to see the sensor’s voltage while the engine runs or is switched on. This check gives clear information about the sensor’s condition.
Reconnecting The Sensor
After setting up your multimeter, reconnect the knock sensor to the engine wiring. Make sure the connector fits tight and secure. A loose connection can cause wrong voltage readings. Check the wires for any damage or dirt. Clean if needed. Proper connection is important before testing voltage.
Testing Signal Output
Turn the ignition key to the ON position without starting the engine. Set your multimeter to the DC voltage setting. Place the positive probe on the sensor’s signal wire. Put the negative probe on a good ground point. Watch the multimeter screen for voltage reading. The voltage should show a small, steady number. If the number is zero or very high, the sensor may be faulty.
Interpreting Results
After testing the knock sensor with a multimeter, understanding the results is key. The readings tell you if the sensor works properly or needs replacement. Clear interpretation helps avoid wrong repairs and saves time. Let’s explore what the readings mean and how to spot issues.
Normal Readings Range
A good knock sensor usually shows a resistance between 500 and 620 ohms. This range varies slightly by car model but stays close. Readings within this range mean the sensor is in good condition. If your multimeter shows this, the sensor is likely working fine.
Measure the resistance with the sensor cold and the ignition off. Keep your multimeter probes steady for an accurate reading. A steady number in the normal range confirms sensor health.
Signs Of A Faulty Sensor
Resistance readings too high or too low point to sensor problems. A reading near zero ohms means a short circuit inside the sensor. Very high or infinite resistance shows an open circuit, indicating a broken sensor.
Fluctuating or unstable readings also suggest sensor damage. Corrosion on sensor connectors can cause bad results. Physical damage or old age often affects sensor performance.
Faulty sensors lead to poor engine performance and check engine lights. Replacing a bad knock sensor keeps the engine running smoothly.
Troubleshooting Tips
Troubleshooting a knock sensor with a multimeter can save time and money. Knowing how to spot issues helps avoid bigger problems. This section covers common issues and signs to replace the sensor.
Common Issues
The knock sensor may show no voltage or erratic readings. Loose or corroded wires often cause this. Check the sensor’s connector for dirt or damage. A faulty sensor may cause engine knocking or poor performance. Sometimes the sensor’s resistance is out of range. Use the multimeter to test resistance and compare it to the manufacturer’s specs. Intermittent signals or no response can also indicate sensor failure.
When To Replace The Sensor
Replace the knock sensor if resistance is too high or low. No voltage output during engine tests is another sign. If the sensor causes persistent engine noise, it likely needs replacement. Broken wires or damaged sensor housing require a new sensor. Sensor age can also affect performance. Follow your vehicle’s maintenance schedule for sensor checks. A new sensor restores proper engine timing and smooth operation.

Credit: www.youtube.com
Frequently Asked Questions
What Tools Do I Need To Test A Knock Sensor?
You need a digital multimeter, vehicle wiring diagram, and basic hand tools. These help measure sensor resistance and signal output accurately for diagnostics.
How Do I Check Knock Sensor Resistance?
Set the multimeter to ohms, disconnect the sensor, and measure resistance across terminals. Compare the reading with manufacturer specifications for proper sensor function.
Can A Faulty Knock Sensor Cause Engine Problems?
Yes, a bad knock sensor can cause poor engine performance, increased emissions, and reduced fuel efficiency. Early testing prevents costly repairs and engine damage.
How To Interpret Voltage Readings From A Knock Sensor?
Start the engine and monitor voltage fluctuations with the multimeter. Voltage changes indicate sensor activity; no change suggests sensor failure or wiring issues.
Conclusion
Testing a knock sensor with a multimeter is simple and useful. You get clear readings that help find sensor problems fast. This check saves time and money on repairs. Keep your engine running smooth by testing regularly. Small steps can prevent big issues later.
Now, you know how to test your knock sensor easily. Try it yourself and keep your car healthy.