If your car’s engine is acting up or your temperature gauge is acting weird, your coolant temperature sensor might be the problem. Knowing how to test this sensor with a multimeter can save you time and money before rushing to the mechanic.
In this guide, you’ll learn simple, step-by-step methods to check your sensor’s health quickly and accurately. By the end, you’ll feel confident spotting issues early and keeping your engine running smoothly. Ready to take control of your car’s performance? Let’s dive in.

Credit: www.wikihow.com
Tools Needed
Testing a coolant temperature sensor requires a few key tools. These tools help you check the sensor’s condition accurately. Having the right equipment saves time and avoids mistakes. Below is a list of essential tools you need for this task.
Choosing The Right Multimeter
A multimeter is the main tool to test the coolant temperature sensor. Pick one that measures resistance and voltage. Digital multimeters are easier to read and more accurate. Look for a model with a clear display and easy controls. Make sure it can measure low resistance values for precise results.
Additional Equipment
Besides the multimeter, you need a few extra items. A pair of insulated test leads is important for safe testing. A screwdriver or socket set helps remove the sensor from the engine. Keep a clean cloth or paper towel handy to wipe dirt from the sensor. Also, a vehicle repair manual can guide you on sensor location and specs.
Locating The Coolant Temp Sensor
Finding the coolant temperature sensor is the first step in testing it with a multimeter. This sensor plays a key role in monitoring the engine’s temperature. Knowing its exact location helps you check it accurately.
Coolant temperature sensors sit in different spots depending on the vehicle model. Sometimes, they are easy to spot near the engine block or cylinder head. Other times, they hide under hoses or near the thermostat housing.
Common Sensor Locations
Most sensors attach to the engine’s cylinder head or intake manifold. These spots let the sensor measure the coolant temperature directly. In some cars, the sensor is near the radiator or thermostat housing. Look for a small sensor with one or two wires connected to it. Checking the car’s manual can help find the exact place quickly. Some vehicles have more than one sensor, so check all possible spots.
Safety Precautions
Always let the engine cool before searching for the sensor. Hot coolant can cause burns and injuries. Wear gloves and safety glasses to protect your hands and eyes. Avoid touching hot engine parts or moving belts. Disconnect the battery to prevent electrical shocks while testing. Work in a well-ventilated area to avoid inhaling fumes. Taking these steps ensures a safe testing process.
Preparing The Vehicle
Preparing your vehicle is a key step before testing the coolant temperature sensor with a multimeter. This ensures safety and accuracy during the process. Taking time to prepare helps avoid mistakes and protects both you and your car.
Start with a cool engine. Hot parts can cause burns or give false readings. Allow the vehicle to sit for at least 30 minutes after driving. This lets the engine and coolant cool down to a safe temperature.
Engine Cooling Tips
Check the coolant level before starting any work. Low coolant can cause overheating and damage. Add coolant if the level is below the minimum mark. Use the type recommended by your vehicle’s manual.
Keep the area around the sensor clean. Dirt and grime can affect the sensor’s performance. Wipe the sensor area gently with a clean cloth. This helps get better test results.
Disconnecting The Battery
Always disconnect the battery before handling electrical parts. This prevents short circuits and shocks. Use a wrench to remove the negative battery cable first. Then remove the positive cable.
Wait at least 10 minutes after disconnecting the battery. This allows the vehicle’s systems to reset. After this, you can safely test the coolant temperature sensor with your multimeter.

Credit: www.samarins.com
Testing Sensor Resistance
Testing the resistance of a coolant temperature sensor is a key step in checking its condition. The sensor changes resistance based on the engine’s temperature. Measuring this resistance helps find out if the sensor works right or if it needs replacement.
Resistance testing requires a multimeter, which measures electrical values. This test shows how the sensor reacts to different temperatures. The readings should match the sensor’s specifications to confirm proper function.
Setting Up The Multimeter
Start by turning off the engine. Remove the sensor from the engine if needed. Set the multimeter to the ohms (Ω) setting. Connect the multimeter probes to the sensor terminals. Make sure the probes touch the metal parts firmly. Avoid touching the probe tips with your hands to keep accuracy.
Measuring Resistance At Various Temperatures
Check the sensor resistance at room temperature first. Note the reading on the multimeter display. Then, warm the sensor slowly using warm water or by placing it near a heat source. Measure the resistance again as the temperature rises. The resistance should decrease when the sensor warms up. Compare these readings to the sensor’s resistance chart. Differences may mean the sensor is faulty and needs replacement.
Interpreting Test Results
After testing the coolant temperature sensor with a multimeter, reading the results correctly is key. The sensor’s resistance changes with temperature. Checking these values helps decide if the sensor works well or needs replacing. Understanding normal resistance ranges and spotting faulty signs saves time and money on repairs.
Normal Resistance Values
The coolant temperature sensor usually shows high resistance when cold. The resistance drops as the sensor warms up. At 20°C (68°F), expect around 2,500 to 3,000 ohms. At 80°C (176°F), resistance should fall to about 200 to 300 ohms. Values within these ranges mean the sensor likely works fine. Always check your vehicle’s manual for exact numbers. Slight differences can occur between models.
Signs Of A Faulty Sensor
Resistance that stays too high or too low signals a bad sensor. No change in resistance with temperature is a clear fault. Infinite resistance or zero ohms means the sensor may be broken or shorted. Erratic readings that jump randomly also indicate sensor failure. A faulty sensor can cause engine overheating or poor fuel efficiency. Replace it promptly to keep your engine safe.
Additional Multimeter Tests
Testing a coolant temperature sensor involves more than just measuring resistance. Additional multimeter tests help check the sensor’s voltage and electrical paths. These tests ensure the sensor works correctly and sends accurate data to the engine control unit. Understanding these tests can help find faults quickly and save repair time.
Voltage Output Check
Set the multimeter to measure voltage (DC volts). Connect the sensor to the engine wiring as usual. Turn the ignition key to the “on” position without starting the engine. Measure the voltage at the sensor’s output wire. The voltage should change as the engine warms up.
A low voltage reading means the sensor may be cold or faulty. A steady voltage with no change often shows a bad sensor or wiring issue. Compare your readings to the car’s service manual to know the correct voltage range.
Continuity Test
Turn off the ignition and disconnect the sensor from the wiring harness. Set the multimeter to the continuity or resistance mode. Place the probes on the sensor terminals. A beep or low resistance reading means good continuity.
No beep or very high resistance suggests a broken sensor wire inside. This test helps find internal sensor damage or wiring breaks. Always check continuity before replacing the sensor to avoid unnecessary parts costs.
Replacing The Sensor
Replacing the coolant temperature sensor can fix engine overheating and improve fuel efficiency. The sensor sends temperature data to the engine control unit. A faulty sensor gives wrong readings and causes engine problems. Follow these steps to remove the old sensor and install a new one safely.
Removing The Old Sensor
First, make sure the engine is cool to avoid burns. Locate the coolant temperature sensor, usually near the thermostat housing. Disconnect the sensor’s electrical connector carefully. Use a wrench or socket to unscrew the old sensor. Turn it counterclockwise until it comes out. Keep a rag nearby to catch any leaking coolant. Dispose of the old sensor properly.
Installing The New Sensor
Check that the new sensor matches the old one exactly. Apply a small amount of thread sealant if recommended. Screw the new sensor into the engine by hand first. Tighten it with a wrench until snug, but do not over-tighten. Reconnect the electrical connector securely. Refill any lost coolant and start the engine. Look for leaks and check sensor operation.
Final Checks
After testing the coolant temperature sensor with a multimeter, take time for final checks. These steps ensure the sensor and your vehicle work properly. Skipping this part can lead to errors or damage.
Reconnecting Components
Carefully reconnect the sensor to the wiring harness. Make sure all clips and connectors fit tightly. Loose connections cause wrong readings or sensor failure. Check the sensor’s mounting to ensure it is secure. A loose sensor may give false signals to the engine control unit.
Verifying Sensor Operation
Start the engine and let it warm up. Watch the temperature gauge or use a scan tool to check sensor data. The readings should change smoothly as the engine heats. If the sensor shows erratic or no change, retest with the multimeter. Confirm the sensor works correctly before driving the vehicle.
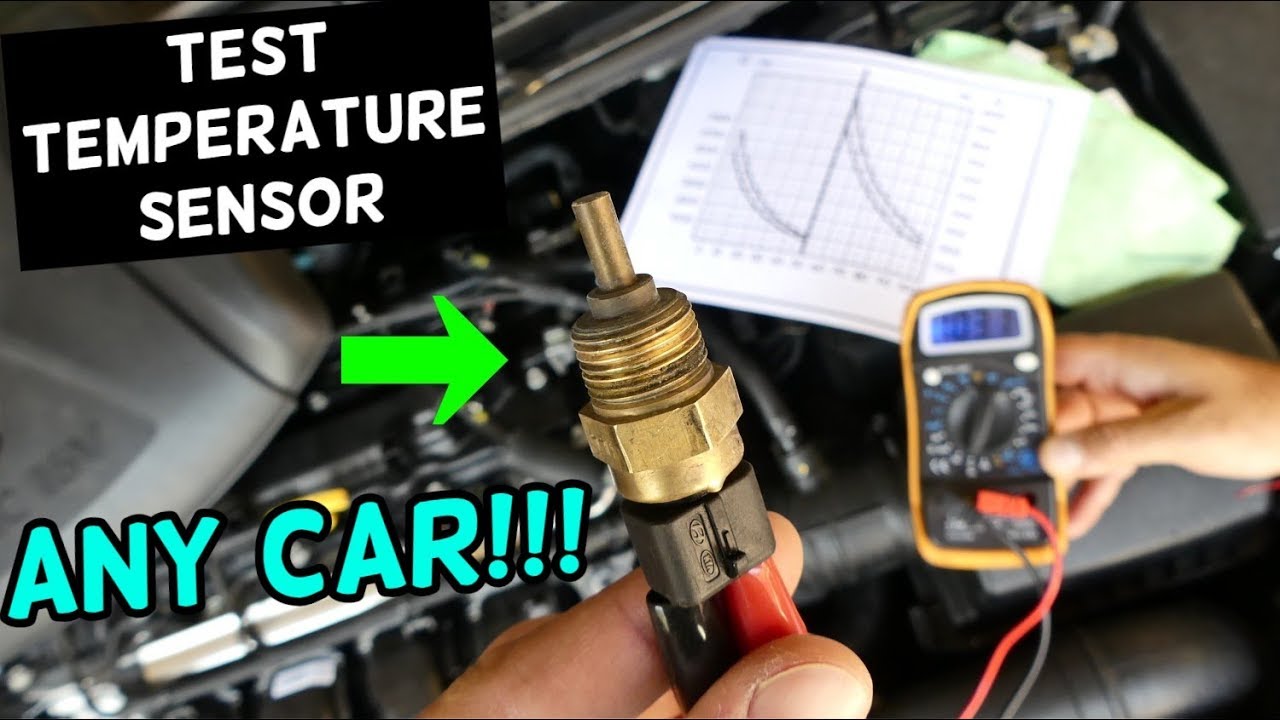
Credit: www.youtube.com
Frequently Asked Questions
How Do I Test A Coolant Temp Sensor With A Multimeter?
Set the multimeter to the ohms setting. Disconnect the sensor and measure resistance. Compare values to the sensor’s specifications.
What Resistance Values Indicate A Faulty Coolant Temp Sensor?
Resistance varies with temperature. Check your vehicle’s manual for correct values. Significant deviation means the sensor may be faulty.
Can I Test A Coolant Temp Sensor Without Removing It?
Yes, you can test it in place. Measure voltage while the engine warms up. Voltage should change as temperature changes.
What Multimeter Settings Are Best For Testing Coolant Temp Sensors?
Use the ohms (resistance) setting to check sensor resistance. Use voltage setting to test sensor output during engine operation.
Conclusion
Testing a coolant temp sensor with a multimeter is simple and quick. You only need basic tools and a little patience. Checking this sensor helps keep your engine running smoothly. It prevents overheating and costly repairs. Remember to follow safety steps and read your car’s manual.
Regular sensor tests save money and avoid breakdowns. Now you can check your sensor with confidence. Try it yourself and keep your car healthy.