Measuring a resistor might sound simple, but if you want accurate results, there’s more to it than just connecting a multimeter. Many people use a multimeter to check resistors, but often miss important details. Getting a wrong reading can lead to bigger problems in your circuit, wasting time or even damaging components.
Whether you’re a hobbyist, student, or technician, knowing the right way to measure a resistor with a multimeter is a key skill in electronics. This guide will help you understand the process, avoid common mistakes, and get reliable results every time.
Understanding Resistors And Multimeters
Before you measure, it’s smart to understand what you’re working with. Resistors are components that limit the flow of electrical current in a circuit. Their values are given in ohms (Ω). They can be tiny (measured in milliohms) or very large (measured in megaohms).
A multimeter is a tool that can measure voltage, current, and resistance. Most people use a digital multimeter (DMM), which shows numbers on a screen. Some still use analog multimeters with a moving needle. Both types work, but digital is easier for beginners.
Types Of Resistors You May Measure
Resistors come in different shapes and sizes:
- Axial resistors: Long, with color bands
- Surface-mount resistors (SMD): Very small, marked with numbers
- Variable resistors (potentiometers): Can adjust resistance
Each type can be measured with a multimeter, but the process is almost the same.
Why Measure A Resistor?
There are several reasons to check resistor values:
- To verify the actual value before using in a circuit
- To check for damage or drift (value has changed over time)
- To identify an unmarked or unknown resistor
Sometimes, resistors are marked with color codes, but these can fade or be misread. Measuring with a multimeter gives you confidence in the actual value.
Tools And Preparation
To measure a resistor, you need the right tools and setup. Skipping preparation leads to mistakes.
Essential Tools
- Digital multimeter (DMM) – Preferred for accuracy and ease.
- Analog multimeter – Works, but less precise.
- Test leads/probes – Often included with the multimeter.
- Tweezers (optional) – Helpful for small SMD resistors.
Preparing Your Workspace
- Work on a non-conductive surface. A wooden or plastic table is ideal.
- Good lighting is important, especially for reading resistor codes.
- Discharge yourself by touching a metal object to avoid static damage to sensitive components.
Safety Precautions
- Always power off the circuit before measuring resistance.
- Remove the resistor from a live circuit, or at least isolate one side.
- Never touch the probe tips together while measuring resistance; it can damage the meter.
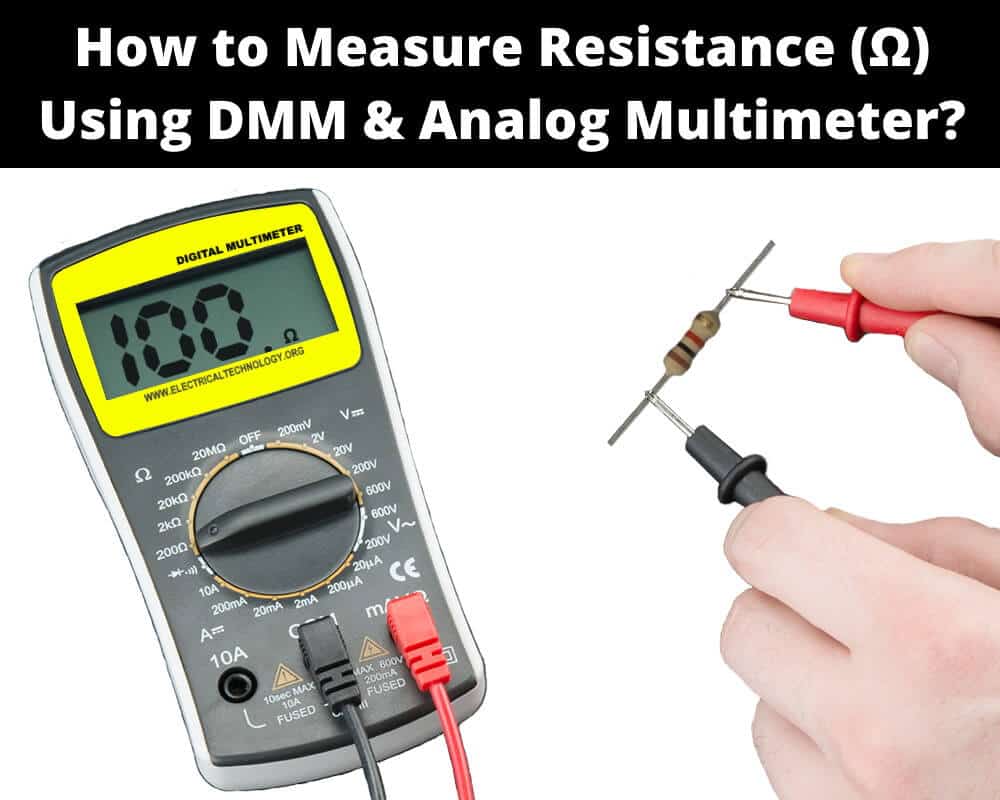
Credit: www.electricaltechnology.org
How To Set Up Your Multimeter For Resistance Measurement
Most mistakes happen here. Take a few seconds to set up your multimeter properly.
Step 1: Turn On The Multimeter
Switch the dial to the resistance mode (Ω symbol). On most digital multimeters, you’ll see several ranges. If your meter is auto-ranging, you don’t need to select a range. If it’s manual-ranging, pick a range higher than the expected resistor value.
Step 2: Zero The Meter (if Needed)
Touch the two probes together. The display should read 0 Ω or very close. If it shows a small resistance, this is the lead resistance. Some high-end meters let you subtract this. For most work, just note the value—it’s usually below 0.5 Ω.
Step 3: Insert Test Leads
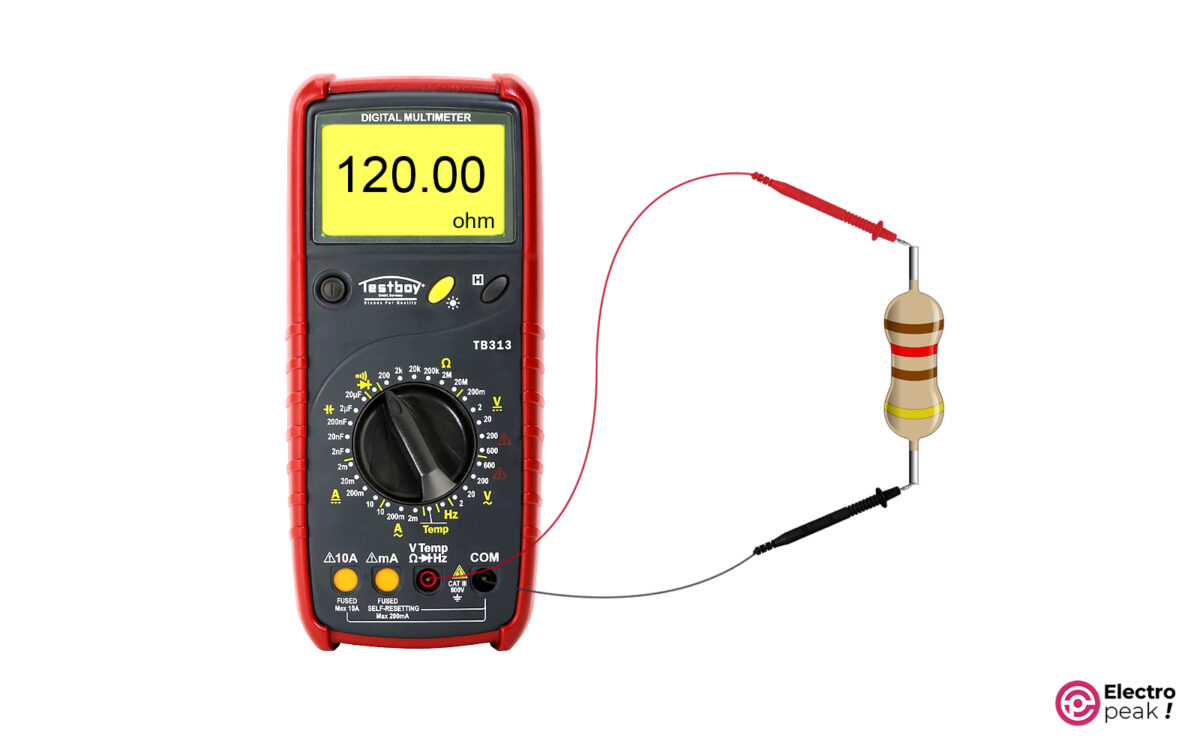
Plug the black lead into the COM port and the red lead into the Ω port. Make sure the connections are tight.
Step 4: Select Proper Range
If your resistor is 1 kΩ (1000 Ω), set the range to 2 kΩ or 20 kΩ. If it’s unknown, start with the highest range, then lower it for more accurate readings.
How To Measure A Resistor With A Multimeter: Step-by-step Guide
Here’s the practical part. Follow each step carefully for accurate results.
1. Remove Power And Isolate The Resistor
Always disconnect power from the circuit. If the resistor is part of a board, remove one end from the circuit. If you measure in-circuit, other paths may affect the result.
2. Hold The Resistor Properly
For loose resistors, pick them up with fingers or tweezers. For tiny SMD resistors, tweezers are best. Make sure your hands don’t touch both leads—your body adds resistance!
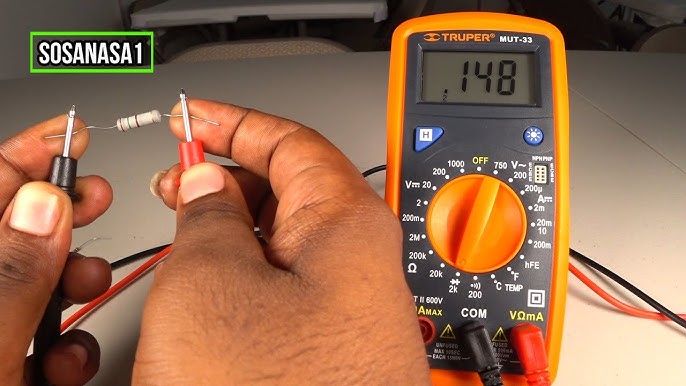
3. Connect Probes To The Resistor
Place one probe on each end of the resistor. Polarity doesn’t matter; resistors work both ways. Hold the probes steady for a few seconds.
4. Read The Display
Wait for the display to settle. The number shown is the resistance in ohms (Ω). If you see “1”, “OL”, or similar, the resistor is above your selected range—pick a higher range.
5. Compare With Expected Value
Check the measured value against the resistor’s color code, markings, or datasheet. A small difference (±5% or ±10%) is normal due to manufacturing tolerances.
Example: Measuring A 10 Kω Resistor
Suppose you have a resistor with brown, black, orange, and gold bands (10 kΩ, 5% tolerance):
- Set the meter to 20 kΩ range.
- Place probes on each end.
- The display shows 9.85 kΩ. This is within 5% of 10 kΩ, so it’s good.
Common Mistakes And How To Avoid Them
Even experienced users make errors. Here are problems to watch for:
- Measuring in-circuit: Other components can create parallel paths, giving a lower reading.
- Not removing power: A powered circuit can damage your meter or give false results.
- Touching both leads: Your body resistance adds error, especially for high-value resistors.
- Wrong range selection: Too low, and you get “OL” or “1” (overload); too high, and you lose accuracy.
- Dirty or corroded leads: Clean them for good contact.
Pro tip: If you must measure in-circuit, expect a lower reading. For precise work, always isolate at least one end of the resistor.
Understanding Multimeter Readings
Interpreting the result is as important as measuring it.
Tolerances
Most resistors have a tolerance—the allowed error from the stated value. Common values are ±1%, ±5%, and ±10%. This means a 1 kΩ ±5% resistor can be anywhere from 950 Ω to 1050 Ω and still be “good”.
What “ol” Or “1” Means
On digital meters, “OL” or “1” usually means overload—the resistance is higher than your selected range, or the resistor is open (broken).
Resistance Too Low
If you see a value much lower than expected, check for parallel paths, dirty connections, or a partially shorted resistor.
Table: Tolerance Ranges For Common Resistor Values
This table shows how much a resistor can vary and still be “good”.
| Nominal Value (Ω) | ±1% Range (Ω) | ±5% Range (Ω) | ±10% Range (Ω) |
|---|---|---|---|
| 1,000 | 990 – 1,010 | 950 – 1,050 | 900 – 1,100 |
| 10,000 | 9,900 – 10,100 | 9,500 – 10,500 | 9,000 – 11,000 |
| 100,000 | 99,000 – 101,000 | 95,000 – 105,000 | 90,000 – 110,000 |
Special Cases: Smd Resistors And High-value Resistors
Not all resistors are the same. Some need extra care.
Measuring Smd (surface-mount) Resistors
SMD resistors are tiny and often marked with 3 or 4 digits. To measure:
- Use sharp probe tips or SMD tweezers.
- Place probes gently—too much force can damage the part.
- Remove the resistor from the board if possible.
Insight: Even small solder flux or residues on SMD pads can change the reading, especially for high values.
High-value Resistors
When measuring resistors above 1 megaohm (1 MΩ):
- Make sure your fingers do not touch both leads.
- Humidity can affect readings—avoid measuring in damp conditions.
- Some meters cannot measure above 20 MΩ; check your manual.
Analog Vs. Digital Multimeters: Which Is Better For Resistance?
Both analog and digital meters can measure resistance, but there are important differences.
Table: Analog Vs. Digital Multimeter For Resistance
| Feature | Analog Multimeter | Digital Multimeter |
|---|---|---|
| Display | Needle (scale) | Numeric (LCD) |
| Accuracy | Lower, harder to read | Higher, easy to read |
| Ease of Use | Takes practice | Beginner-friendly |
| Lead Resistance Compensation | Manual (zero adjust) | Automatic or negligible |
| Cost | Usually cheaper | Varies, often affordable |
Digital multimeters are best for most users. Analog meters still have uses, especially for checking trends (e.g., seeing resistance change as a potentiometer turns).
Practical Tips For Accurate Measurements
Getting a precise measurement is not just about following steps—it’s about technique.
- Wait for the reading to stabilize. Jumping numbers can mean a loose connection.
- Clean resistor leads. Use a pencil eraser or sandpaper for old, oxidized resistors.
- Don’t rush. Hold the probes for a few seconds, especially for high values.
- Check your battery. A weak multimeter battery gives strange readings, especially on analog meters.
- Label measured resistors. If you have many unmarked resistors, write values on paper tape.
Non-obvious insight: For critical circuits, measure each resistor before installing. Sometimes, even new resistors are out of spec.
Measuring Resistors In Circuit: Is It Possible?
Many beginners want to measure resistors without removing them from the board. This is sometimes possible, but there are challenges.
In-circuit Measurement
- You may get a lower reading due to parallel components (e.g., another resistor connected across it).
- Capacitors in parallel can also affect the result—wait a few seconds for the reading to settle.
- Diodes or transistors can give false readings; they conduct in one direction.
Best practice: If the reading matches or is lower than expected, the resistor is likely OK. If it’s higher, lift one end and measure again.
Credit: electropeak.com
How To Identify A Faulty Resistor
Measuring can also help spot bad resistors.
- Open resistor: Shows “OL”, “1”, or infinite resistance.
- Shorted resistor: Shows zero or very low resistance (much lower than rated).
- Drifted value: Much higher or lower than tolerance allows.
If a resistor is visually damaged (burned or cracked), replace it—even if the reading is “OK”.
Troubleshooting: When The Reading Seems Wrong
Sometimes, the multimeter shows a value that doesn’t make sense. Here’s how to troubleshoot:
- Check your range. Try a higher or lower setting.
- Clean leads and probes. Dirt can add resistance.
- Test a known resistor. Use a new 1 kΩ resistor to see if the meter works.
- Replace the multimeter battery. Low battery causes errors.
- Repeat the test. Sometimes, moving the probes gives a different result.
If you follow all these steps and still get strange results, your resistor may be damaged or the multimeter might need repair.
Advanced: Measuring Very Low Or High Resistances
Standard meters measure from a few ohms up to 20 MΩ or 200 MΩ. For extreme values:
- Below 1 Ω (milliohms): Use a special milliohm meter or 4-wire (Kelvin) measurement. Regular meters are not accurate.
- Above 20 MΩ: Some high-end meters can do this, but humidity, dirt, and meter limits all affect accuracy.
Non-obvious insight: For precise work, always check your multimeter’s datasheet for its resistance range and accuracy.
Real-world Example: Sorting A Box Of Old Resistors
Suppose you find a box of mixed resistors with faded color bands. Here’s a practical method:
- Set your meter to auto-range or highest manual range.
- Pick a resistor, measure, and write down the value.
- Group resistors into common values (e.g., 1 kΩ, 10 kΩ, 100 kΩ).
- Store each group in labeled bags.
Tip: Sometimes, resistors with the same color bands can measure differently due to old age or heat damage. Trust your meter over color codes for old parts.
When To Replace A Resistor
After measurement, if a resistor:
- Is outside the allowed tolerance
- Shows open or short circuit
- Is physically damaged (burn, crack, discoloration)
Then you should replace it with a new one of the same value and tolerance.
Final Checklist: Measuring A Resistor With A Multimeter
To make sure you never miss a step, remember:
- Power off and isolate the resistor.
- Set the meter to the correct range.
- Hold probes on each lead.
- Read and compare the value.
- Check if it’s within tolerance.
- If in doubt, double-check and replace if needed.
Credit: www.youtube.com
Summary Table: Quick Steps To Measure A Resistor
This table sums up the main steps for quick reference:
| Step | Action |
|---|---|
| 1 | Power off and remove (or isolate) resistor |
| 2 | Set multimeter to resistance (Ω) mode |
| 3 | Choose correct range (or auto) |
| 4 | Connect probes to resistor leads |
| 5 | Read value and compare to expected |
| 6 | Decide: within tolerance (OK) or replace |
Frequently Asked Questions
What Does “ol” Or “1” Mean On My Multimeter When Measuring Resistance?
“OL” or “1” means overload. The resistor’s value is higher than your selected range, or the resistor is open (not conducting). Try a higher range or check if the resistor is damaged.
Can I Measure A Resistor Without Removing It From The Circuit?
You can, but the reading may not be accurate. Other components in parallel can lower the measured value. For best results, remove one end from the circuit.
What Is The Tolerance Of A Resistor, And Why Does It Matter?
Tolerance is how much a resistor can vary from its stated value and still be “good”. For example, a 1 kΩ ±5% resistor can be between 950 Ω and 1,050 Ω. Always compare your measured value to the tolerance.
Why Does My Multimeter Show A Lower Value Than The Color Code?
This usually means there’s a parallel path in the circuit, dirty leads, or the resistor has aged and changed value. Isolate the resistor or clean the leads and measure again.
Is A Digital Or Analog Multimeter Better For Measuring Resistors?
A digital multimeter is easier to use and more accurate for most users. Analog meters work but need more skill to read.
For more detail on resistor codes and electronics basics, you can check out Wikipedia’s Resistor page.
Whether you’re checking a single resistor or sorting a whole box, measuring resistors with a multimeter is a core electronics skill. With the right steps and a bit of care, you’ll always get accurate, reliable results.