Testing a chainsaw coil with a multimeter may sound technical, but it’s a skill every chainsaw owner should know. When a chainsaw won’t start or runs poorly, the ignition coil is often the culprit. This small, critical part sends electrical energy to the spark plug, starting the combustion process. If the coil fails, your chainsaw could leave you stranded in the middle of a project. Learning how to use a multimeter to check the coil saves both time and money—and helps you avoid unnecessary trips to a repair shop.
This guide breaks down each step in simple language. Whether you’re a DIY enthusiast or a first-time chainsaw user, you’ll learn not just the “how,” but also the “why” behind each action. You’ll discover what tools you need, how to prepare your work area, and the exact testing process for both primary and secondary coil windings. Along the way, you’ll find practical tips, real examples, and solutions to common mistakes—insights you rarely get in basic manuals or quick video guides.
Understanding Chainsaw Ignition Coils
Before picking up your multimeter, it’s important to know what a chainsaw coil does. The ignition coil is an electrical transformer. Its job is to convert the low voltage from the chainsaw’s magneto into a high voltage that jumps across the spark plug gap. This spark ignites the fuel, making the engine run.
When the coil fails, the spark becomes weak or disappears completely. You might experience:
- Hard starting or no start at all
- Engine misfiring
- Poor acceleration
- Rough idle
Some issues mimic coil failure (like spark plug or carburetor problems), so proper testing is essential.
How The Coil Works
The coil has two windings inside: primary (with fewer turns of wire) and secondary (with many more turns). When the flywheel magnet passes the coil, it creates a changing magnetic field. This field induces voltage in the windings, creating the spark.
What Causes Coil Failure?
Coils can fail due to:
- Overheating (often from clogged cooling fins)
- Moisture and corrosion
- Wire insulation breakdown
- Physical damage from impacts or vibration
Early detection of coil problems prevents more expensive repairs.
Tools And Safety Precautions
Testing a chainsaw coil is safe if you follow some basic rules. Here’s what you need:
Essential Tools
- Digital Multimeter: Choose one with an ohmmeter function (measures resistance in ohms).
- Screwdrivers: Flathead or Phillips, depending on your chainsaw’s design.
- Work Gloves: Protect your hands from sharp parts.
- Owner’s Manual: For coil location and resistance specifications.
Safety First
- Disconnect the spark plug before starting. This prevents accidental engine firing.
- Work in a dry, well-lit area.
- Avoid wearing loose clothing or jewelry.
- Handle the chainsaw gently; don’t force parts apart.
Pro Tip: If you suspect the coil is wet, let it dry completely before testing. Moisture can give false readings.

Credit: www.youtube.com
Preparing The Chainsaw For Testing
A little preparation makes the test smoother and safer.
Step 1: Cool Down And Clean
Let the chainsaw cool if it’s been running. Clean dirt and sawdust around the ignition module to avoid debris falling inside.
Step 2: Remove The Top Cover
Use your screwdriver to remove the top or side cover that protects the ignition system. On most chainsaws, the coil sits near the flywheel.
Step 3: Disconnect The Spark Plug Wire
Pull the spark plug boot off the plug. This isolates the coil for accurate testing.
Step 4: Locate The Ignition Coil
The coil is usually a small black box with two wires:
- One wire to the spark plug boot (secondary winding)
- One or two wires to the kill switch or ground (primary winding)
If you’re unsure, check your manual for diagrams.
Non-Obvious Insight: Some coils have an integrated kill switch wire. Make sure you identify all connections, as missing one can lead to wrong test results.
Setting Up The Multimeter
A multimeter can seem intimidating, but it’s easy to use with a little practice.
Step 1: Select The Ohm (ω) Setting
Turn the dial to the lowest resistance range, typically 200 Ω or 2 kΩ. If your multimeter is auto-ranging, set it to “resistance. ”
Step 2: Zero The Meter
Touch the two probes together. The display should read 0 or very close. If not, consult your manual—your meter may need calibration.
Step 3: Check The Probes
Inspect the probes for any breaks or loose wires. Faulty probes can give misleading readings.
Practical Tip: Always hold probes by the insulated handles to avoid shocks and ensure accuracy.
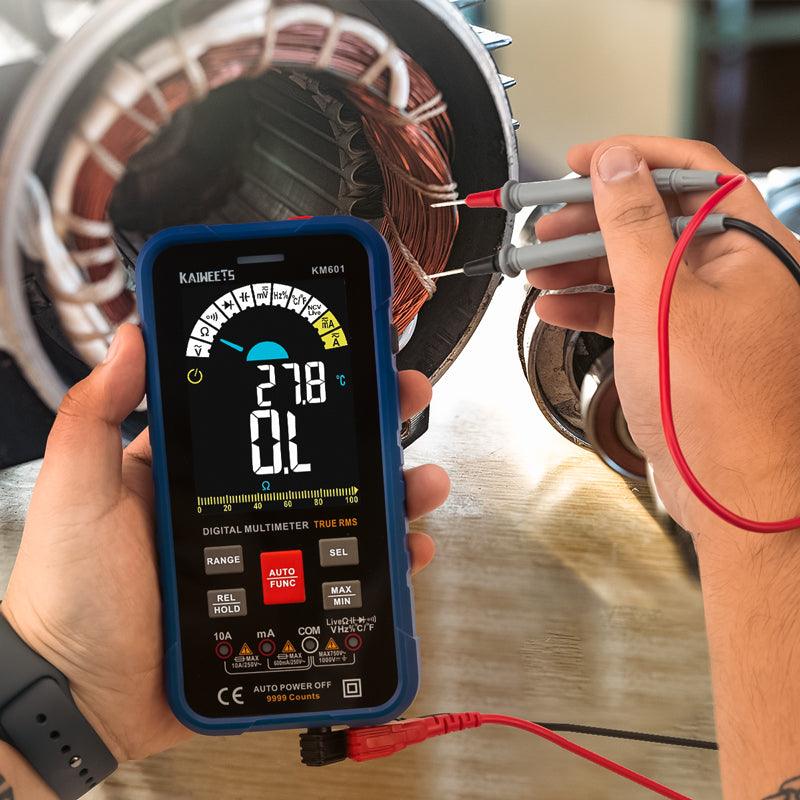
Credit: kaiweets.com
Testing The Primary Coil Winding
The primary winding is the low-voltage part of the coil. Testing it helps identify basic faults.
Step 1: Identify The Primary Terminals
Find the small wire(s) that connect to the kill switch or ignition module. These are your primary coil connections.
Step 2: Place The Probes
- Touch one probe to the metal terminal where the primary wire connects.
- Touch the other probe to the coil’s ground point (often the mounting screw or metal case).
Step 3: Read The Resistance
Typical primary coil resistance is 0.2 to 2.0 ohms. Check your owner’s manual for the exact value.
- If the reading is infinite (open circuit), the coil is broken.
- If the reading is zero (short circuit), the coil is also faulty.
Example:
Suppose your manual says the primary winding should be 0. 5 ohms. If your meter reads 0. 5–0. 7 ohms, the coil is healthy. If you get “OL” (overload) or a very high number, the coil is likely open.
Common Beginner Mistake
Some people forget to clean the terminals before testing. Dirt or corrosion can block the probe’s contact, causing false “open” readings. Always clean with a dry cloth or sandpaper first.
Testing The Secondary Coil Winding
The secondary winding sends high voltage to the spark plug. This test is crucial because many coil failures happen here.
Step 1: Identify The Secondary Terminals
- One probe goes into the spark plug wire boot (deep inside; use a thin probe if needed).
- The other probe touches the coil’s ground.
Step 2: Read The Resistance
Secondary resistance is usually 2,000 to 15,000 ohms (2k–15k Ω). Again, check your manual for the exact specification.
Step 3: Compare The Reading
- A reading within the specified range means the coil is good.
- Infinite or zero means a faulty coil.
Example:
Your manual specifies 5,000–7,000 ohms. If you measure 6,200 ohms, that’s healthy. If you see “OL” or “0,” the coil is bad.
Pro Insight
Many chainsaw users skip the secondary test, but some coils fail only under high voltage. Always check both windings for a full diagnosis.
Interpreting Your Results
It’s not enough to get a number—you need to know what it means. Here’s a quick reference chart:
| Test Point | Expected Resistance | What It Means |
|---|---|---|
| Primary winding | 0.2–2 Ω | Normal if within range |
| Primary winding | 0 or infinite Ω | Coil is faulty |
| Secondary winding | 2,000–15,000 Ω | Normal if within range |
| Secondary winding | 0 or infinite Ω | Coil is faulty |
If both windings test good, your ignition coil is likely fine. If either fails, replacement is needed.
Non-Obvious Insight: Some coils show good resistance when cold but fail when hot. If your chainsaw starts cold but dies warm, test the coil after warming it up.
Troubleshooting Inconsistent Results
Sometimes, your readings don’t match the manual or change each time you test. Here’s what to check:
1. Battery In The Multimeter
A weak battery can cause unstable readings. Replace it if the display flickers.
2. Probe Contact
Make sure the probes touch clean, shiny metal—not painted or rusty spots.
3. Ambient Conditions
High humidity or a wet coil can cause false “short” readings. Dry everything before testing.
4. Multiple Coils
Some chainsaws have two coils or dual-spark systems. Test each coil separately, referring to your model’s diagram.
Example:
If you get 1. 5 ohms on the primary test, then 0. 4 ohms the next time, check for loose probe connections or dirty terminals.
Testing With The Coil Installed Vs. Removed
You can test the coil while it’s still attached to the chainsaw or after removal.
Testing Installed
- Faster and easier
- Risk of interference from other components (kill switch, wires)
Testing Removed
- Most accurate (isolates the coil from other faults)
- Takes more time (requires more disassembly)
Here’s a simple comparison:
| Method | Accuracy | Effort Required |
|---|---|---|
| Installed | Moderate | Low |
| Removed | High | Medium/High |
Tip: If you get a failed reading with the coil installed, test again after removing it to confirm.
What To Do If The Coil Tests Bad
A coil that fails either test must be replaced. Here’s what to consider:
Finding The Right Replacement
- Match the part number: Use your chainsaw’s manual or the coil’s printed number.
- Buy from a reputable source: Cheap, low-quality coils can fail quickly.
- Check compatibility: Not all coils fit all models, even from the same brand.
Installing The New Coil
- Reverse the removal steps.
- Adjust the air gap (distance between coil and flywheel), usually 0.2–0.4 mm. Use a business card as a gauge if you don’t have a feeler gauge.
Beginner Mistake: Forgetting to adjust the air gap can cause weak or no spark. Always check the gap before tightening everything down.
Common Problems That Mimic Coil Failure
Sometimes, the coil isn’t the real issue. Here are other things to check:
1. Spark Plug
A fouled or cracked spark plug won’t spark, even if the coil is fine. Replace plugs before replacing the coil.
2. Kill Switch
A stuck or shorted kill switch wire can ground the coil, stopping the spark.
3. Wiring
Broken, loose, or corroded wires between the coil and other parts can interrupt the signal.
4. Flywheel Magnets
Weak or damaged magnets won’t create enough current for the coil.
Real-world Example:
A chainsaw with a good coil but a grounded kill switch wire will not start. Always check these simple items first.
Advanced: Testing For Intermittent Coil Failure
Some coils work when cold but fail when hot. This problem is tricky to catch.
How To Test
- Warm up the chainsaw until it fails.
- Quickly disconnect, remove, and test the coil.
- Compare readings to the cold test.
If resistance jumps outside the normal range when hot, the coil is breaking down internally.
Pro Tip: Use a hairdryer to heat the coil for testing without running the engine.

Credit: grwinding.com
Should You Repair Or Replace A Coil?
Unlike some parts, ignition coils are rarely repairable. The fine wires inside are impossible to fix without special tools and knowledge.
- Replace if the coil fails any test.
- Repair only if the problem is an external wire, boot, or terminal (easy to see and fix).
Repair attempts on the coil itself usually fail and waste time.
Real-world Case Study
Jake, a forestry worker, noticed his chainsaw would start cold but die after five minutes. He tested the coil cold (resistance normal) and then hot (infinite resistance). Replacing the coil solved the problem instantly. This shows why checking both hot and cold is vital, not just one.
Tips For Accurate Testing
- Always refer to your chainsaw’s manual for resistance values.
- Use a quality digital multimeter. Cheap or old meters can give false readings.
- Clean all contacts before testing.
- Test both primary and secondary windings.
- If unsure, repeat the test for confirmation.
Non-Obvious Tip: Some coils have built-in resistors. The resistance value may be higher than you expect—always check specifications.
When To Seek Professional Help
If you’ve tested the coil and everything else, but the chainsaw still won’t spark, it’s time for expert help. Some faults require advanced equipment or experience to diagnose. A certified technician can test under load and spot hidden problems.
Comparison: Diy Testing Vs. Shop Repair
How does at-home coil testing compare with taking your chainsaw to a repair shop?
| Factor | DIY Testing | Shop Repair |
|---|---|---|
| Cost | Low (only tools needed) | Medium to High (labor & parts) |
| Time | Usually fast | May take days/weeks |
| Accuracy | High with care | Very high (professional tools) |
| Learning Value | High | Low |
Responsible Disposal Of Faulty Coils
Don’t throw old coils in the trash. They contain metals and plastics that can pollute. Take them to a recycling center or your local small engine shop for proper disposal.
Frequently Asked Questions
What Resistance Should A Chainsaw Coil Have?
Most chainsaw coils have a primary resistance of 0.2–2.0 ohms and a secondary resistance of 2,000–15,000 ohms. However, always check your owner’s manual for the exact values for your model.
Can A Chainsaw Coil Fail When Hot But Work When Cold?
Yes, this is a common problem. The coil’s internal insulation may break down with heat, causing it to stop working after warming up. Testing both cold and hot is important for accurate diagnosis.
How Do I Know If My Multimeter Is Accurate?
Test your multimeter on a known resistor or battery first. If the readings match the labeled value, your meter is working correctly. Weak batteries or damaged probes can cause errors.
Is It Safe To Test A Chainsaw Coil With The Spark Plug Attached?
No, always disconnect the spark plug wire before testing the coil. This prevents accidental engine firing and ensures accurate readings by isolating the coil from other components.
Where Can I Find More Information About Ignition Systems?
A reliable source for deeper technical details is the Wikipedia Ignition System page.
Testing a chainsaw coil with a multimeter is a practical skill that saves money and trouble. By following these steps and tips, you can confidently diagnose coil problems, keep your chainsaw running smoothly, and avoid unnecessary repairs. The process is simple, safe, and gives you control over your equipment’s health—so grab your multimeter and start testing with confidence.