If your car is acting up or your fuel efficiency is dropping, your oxygen sensor might be the culprit. But how do you know for sure?
Testing an oxygen sensor with a multimeter is easier than you think—and it can save you time and money on repairs. In this guide, you’ll learn simple, step-by-step instructions that anyone can follow, even if you’re not a car expert.
Keep reading to find out how to check your oxygen sensor quickly and confidently, so you can get your vehicle running smoothly again.
Oxygen Sensor Basics
The oxygen sensor is a small device in your vehicle’s exhaust system. It helps the engine run efficiently and cleanly. The sensor measures the oxygen level in the exhaust gases. This data tells the engine computer how much fuel to use. A good oxygen sensor saves fuel and reduces pollution.
Knowing the basics of oxygen sensors helps you understand their importance. It also makes testing them easier. Below are key points about their role and types.
Role In Vehicle Performance
The oxygen sensor affects fuel efficiency and engine power. It sends signals to the engine control unit (ECU). The ECU adjusts the air-fuel mix based on these signals. A faulty sensor can cause poor fuel economy and rough running. It can increase emissions and damage the catalytic converter.
Types Of Oxygen Sensors
There are two main types of oxygen sensors. The narrowband sensor is common in older cars. It works well but gives limited data. The wideband sensor is newer and more accurate. It provides a broader range of oxygen levels. Some cars have multiple sensors to monitor different exhaust parts.
Tools Needed
Testing an oxygen sensor with a multimeter requires the right tools. Using proper equipment makes the process smooth and accurate. Gather everything before starting to save time and avoid mistakes.
Choosing The Right Multimeter
Select a digital multimeter for clear readings. It should measure voltage, resistance, and continuity. A multimeter with auto-ranging helps beginners. Check if the device has a backlight for better visibility in dark spaces.
Look for a multimeter with a temperature probe if possible. It can test sensor heat elements. Ensure the multimeter is in good condition and has fresh batteries.
Additional Equipment
Besides the multimeter, use safety gloves to protect your hands. A pair of needle-nose pliers helps disconnect sensor wires safely. Keep a service manual or wiring diagram for your vehicle nearby.
Have a flashlight ready to see sensor connectors clearly. Small screwdrivers or socket wrenches may be needed to reach the sensor. Clean rags or paper towels help wipe dirt from the sensor area.
Preparing For The Test
Preparing for the oxygen sensor test is an important step. It helps ensure accurate results and safety. Before starting, gather your tools and know what to expect. Take your time to avoid mistakes. This section guides you through the preparation process.
Locating The Oxygen Sensor
Find the oxygen sensor in your vehicle first. It is usually near the exhaust manifold or exhaust pipe. Some cars have more than one sensor. Check your car manual for exact location. Look for a small device with wires attached. Clean the area around the sensor if it is dirty. This makes testing easier and safer.
Safety Precautions
Always prioritize safety before testing the sensor. Make sure the engine is off and cool. Hot parts can cause burns. Wear gloves and safety glasses to protect yourself. Work in a well-ventilated area to avoid breathing harmful fumes. Disconnect the battery to prevent electrical shocks. Use insulated tools for extra safety. Take your time and stay focused during the test.
Credit: www.youtube.com
Testing Sensor Voltage
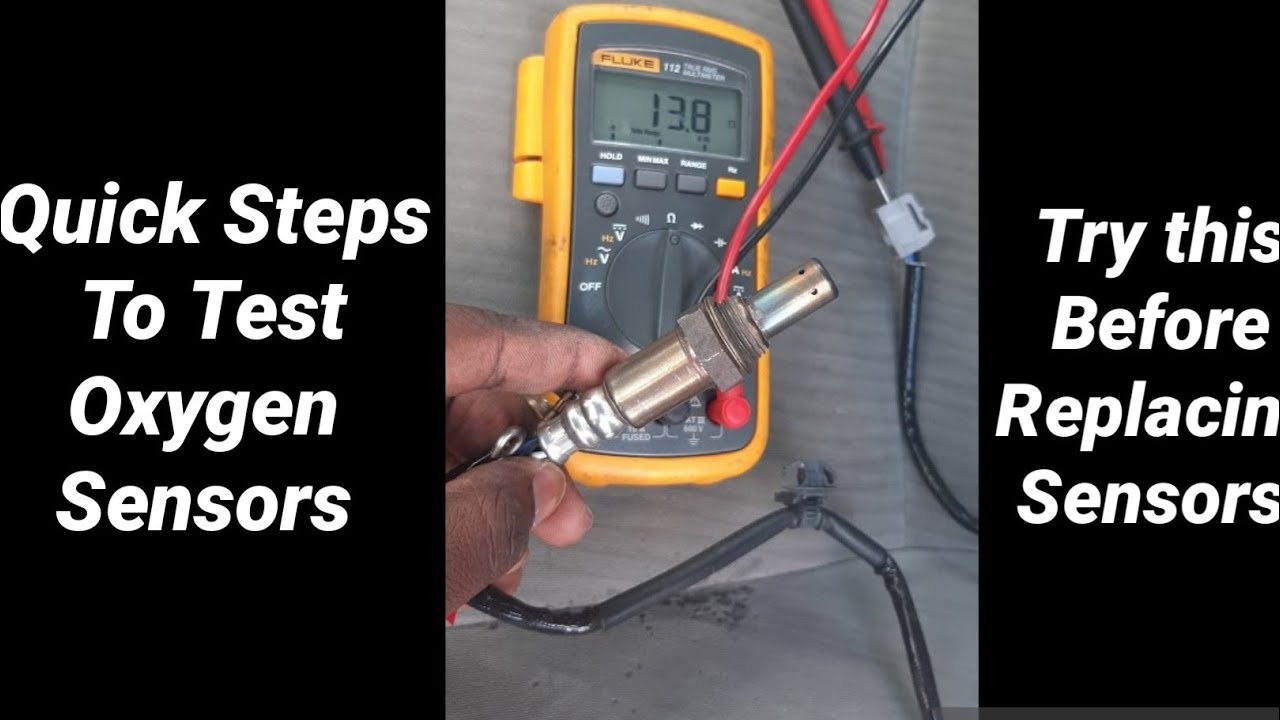
Testing the oxygen sensor voltage is a key step in checking its health. The sensor creates a small voltage that changes with oxygen levels in the exhaust. Measuring this voltage helps spot problems early. Follow these steps to get accurate results with a multimeter.
Setting Up The Multimeter
Start by turning on the multimeter. Set it to measure voltage in DC mode. Choose a range that includes 1 volt or lower. This setting matches the sensor’s typical voltage output. Next, connect the red probe to the multimeter’s voltage terminal. Attach the black probe to the common terminal. Check the probes for any damage before use.
Measuring Voltage Output
Locate the oxygen sensor’s signal wire. It usually has a special color, different from the heater wires. Place the red probe on this wire’s connector pin. Attach the black probe to a good ground point on the car. Start the engine and let it reach operating temperature. Watch the multimeter display. The voltage should move between 0.1 and 0.9 volts. A steady or no change voltage means the sensor may be faulty.
Checking Sensor Resistance
Checking the resistance of an oxygen sensor is a key step in testing its condition. The sensor’s resistance tells you if the internal heating element works well. This heating element helps the sensor reach the right temperature quickly. Measuring resistance is simple with a multimeter set to ohms. The results guide you to understand if the sensor is good or needs replacing.
Using The Ohmmeter Function
Start by turning off the car and disconnecting the oxygen sensor. Set your multimeter to the ohmmeter mode. This mode measures electrical resistance in ohms. Connect the multimeter probes to the sensor’s heater terminals. These terminals are usually two wires of the same color. Hold the probes steady and read the value on the screen. Avoid touching the sensor or wires during testing for accurate results.
Interpreting Resistance Values
Compare the reading with the sensor’s resistance range from the manual. Most oxygen sensors have a heater resistance between 3 and 14 ohms. A value inside this range means the heater works properly. A reading of zero or very low ohms indicates a short circuit. A very high or infinite reading means the heater is broken or disconnected. These results help decide if the sensor needs replacement or repair.

Credit: www.fluke.com
Analyzing Sensor Response
Analyzing the oxygen sensor response is a key step in testing it with a multimeter. This process shows how well the sensor reacts to changes in the engine’s air-fuel mixture. A healthy sensor changes voltage quickly and smoothly. This quick change helps the engine run efficiently and keeps emissions low.
Warm-up Time Considerations
The oxygen sensor needs time to warm up before it works correctly. Usually, it takes about 60 seconds after starting the engine. During this time, the sensor voltage may be low or steady. Testing the sensor before it warms up can give wrong readings. Always wait until the sensor reaches its operating temperature to get accurate results.
Response To Fuel Mixture Changes
The sensor voltage changes as the engine air-fuel mixture changes. A rich mixture causes high voltage, near 0.9 volts. A lean mixture causes low voltage, around 0.1 volts. Use the multimeter to watch these voltage changes. The sensor should switch voltage quickly between high and low. Slow or no change means the sensor might be faulty. This test helps confirm if the oxygen sensor is working well.
Common Issues And Troubleshooting
Oxygen sensors can cause many engine problems. Testing them with a multimeter helps find faults fast. Knowing common issues saves time and money. Troubleshooting steps guide you through fixing sensor problems.
Faulty Sensor Symptoms
A bad oxygen sensor causes rough engine running. The engine may stall or hesitate during acceleration. Fuel economy drops noticeably. The check engine light often turns on. Black smoke from the exhaust might appear. Emissions increase and may fail inspection tests.
When To Replace The Sensor
Replace the sensor if readings show no voltage change. If the sensor has physical damage or corrosion, it needs replacement. Sensors older than 60,000 miles often fail. Slow or no response in voltage tests means replacement. Persistent engine problems after cleaning suggest a new sensor.
Credit: www.tacomaworld.com
Tips For Accurate Testing
Testing an oxygen sensor with a multimeter requires care and precision. Accurate results help you understand the sensor’s condition. Follow these tips to avoid errors and get reliable readings. Small mistakes can cause wrong diagnoses and wasted time.
Avoiding Common Mistakes
Do not test the sensor while the engine is cold. The sensor needs to be warm for correct readings. Avoid touching the sensor wires with bare hands to prevent damage. Check the multimeter leads for damage before testing. Never test the sensor with the ignition off. Always connect the multimeter probes firmly to the correct terminals.
Maintaining Multimeter Accuracy
Calibrate the multimeter regularly to keep it accurate. Use fresh batteries to avoid weak readings. Set the multimeter to the correct measurement type and range. Clean the multimeter probes to ensure good contact. Store the multimeter in a dry, safe place to protect it from damage.
Frequently Asked Questions
How Do I Test An Oxygen Sensor With A Multimeter?
To test an oxygen sensor, set your multimeter to measure resistance or voltage. Check the sensor’s heater circuit resistance first. Then, measure voltage output while the engine runs. Compare readings with manufacturer specifications to determine sensor condition.
What Multimeter Setting Is Best For Oxygen Sensor Testing?
Use the multimeter’s ohms setting to test resistance. For voltage output, switch to the DC voltage setting. This helps you check sensor heating elements and signal voltage accurately, ensuring proper oxygen sensor function.
How Long Does It Take To Test An Oxygen Sensor?
Testing an oxygen sensor typically takes 10 to 15 minutes. This includes checking resistance, voltage, and sensor response. Quick testing helps identify sensor faults efficiently during vehicle diagnostics.
Can A Faulty Oxygen Sensor Affect Engine Performance?
Yes, a bad oxygen sensor can cause poor fuel economy. It may trigger rough idling, engine hesitation, or increased emissions. Timely sensor testing and replacement maintain optimal engine performance and reduce pollution.
Conclusion
Testing an oxygen sensor with a multimeter is simple and clear. Follow the steps carefully to get accurate results. Knowing how to check the sensor helps keep your car running well. A good sensor saves fuel and reduces pollution. Take your time and use the right tools.
This skill saves money on repairs. Now, you can test your oxygen sensor confidently and safely.