Are you worried about the safety and performance of your electrical panel? Knowing how to test your electrical panel with a multimeter can save you time, money, and even prevent dangerous accidents.
You’ll learn simple, step-by-step methods to check your panel’s health quickly and accurately. Whether you’re a beginner or just want to brush up on your skills, this guide will give you the confidence to handle your electrical panel like a pro.
Keep reading to discover the easy way to protect your home and ensure your electrical system is working perfectly.
Safety Precautions
Testing an electrical panel can be risky. Safety must be your top priority. Follow key safety steps to protect yourself from electrical shocks and injuries. Understanding and applying these precautions helps you work with confidence and care.
Wear Protective Gear
Always wear safety glasses to protect your eyes from sparks. Use insulated gloves to avoid electric shocks. Wear non-conductive shoes to reduce risk of grounding. Protective gear acts as a barrier between you and electricity.
Turn Off Power
Switch off the main power supply before testing. Double-check with your multimeter to confirm no live current. Never assume the power is off without testing. This step prevents accidental shocks and equipment damage.
Use Insulated Tools
Choose tools with insulated handles to avoid electric current flow. Avoid metal tools without insulation as they increase shock risk. Insulated tools keep you safe while working inside the panel.
Multimeter Basics
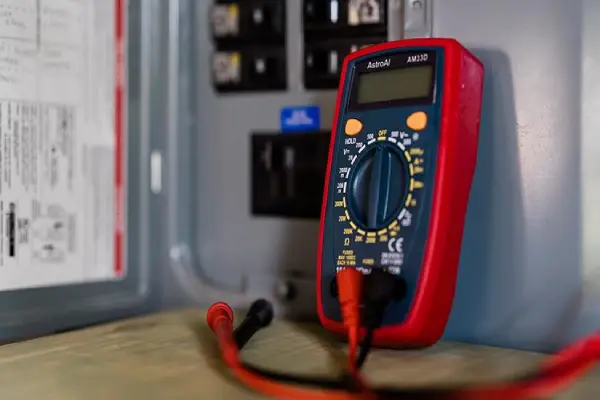
Understanding multimeter basics is essential before testing an electrical panel. A multimeter is a tool that measures voltage, current, and resistance. It helps find electrical problems safely and accurately. Knowing the parts and settings makes testing easier and more effective.
Types Of Multimeters
There are two main types of multimeters: analog and digital. Analog multimeters use a needle to show readings. Digital multimeters show numbers on a screen. Digital multimeters are easier to read and more common today. Some advanced models have extra features like temperature or frequency measurement.
Multimeter Settings
Multimeters have different settings for measuring voltage, current, and resistance. Voltage settings can be AC or DC. AC is for alternating current, like home electricity. DC is for direct current, like batteries. Current settings measure the flow of electricity. Resistance settings check if wires or devices are broken or connected. Choose the correct setting before testing.
Probes And Leads
Probes and leads connect the multimeter to the electrical panel. The red probe is usually positive, and the black is negative or ground. Keep the probes clean and undamaged for accurate readings. Hold the probes steady on the points you want to test. Never touch the metal parts while measuring to avoid electric shock.
Preparing The Panel
Preparing the electrical panel is the first step to testing it safely with a multimeter. This stage helps you understand the layout and access the necessary parts. Taking time here prevents mistakes and keeps you safe.
Locate The Electrical Panel
Find the main electrical panel in your building. It is usually in a basement, garage, or utility room. Look for a metal box mounted on the wall. The panel has a door and often a label saying “Electrical Panel” or “Circuit Breaker Box.”
Identify Circuit Breakers
Inside the panel, you will see several switches. These are the circuit breakers. Each one controls power to different parts of the building. Labels next to each breaker tell which area they serve. Knowing this helps you test specific circuits safely.
Remove Panel Cover
Turn off the main breaker before removing the panel cover. Use a screwdriver to take out the screws holding the cover. Carefully lift the cover off to expose the breakers and wiring inside. Keep the cover and screws in a safe place for reassembly.

Credit: mccarrickelectric.com
Testing Voltage
Testing voltage in an electrical panel is a key step to ensure safety and proper function. It helps identify if the power supply works well. You can use a multimeter to do this safely and accurately. Follow simple steps to measure voltage at different points in the panel.
Take your time and double-check your settings before starting. A wrong setting can give false readings or harm your meter. Stay cautious and use tools correctly to avoid electrical shock.
Set Multimeter To Ac Voltage
Start by turning your multimeter dial to AC voltage (VAC). This setting measures the voltage from the power supply. Usually, the AC voltage range is marked with a “V~” symbol. Choose a range higher than the expected voltage, often 200V or 600V. This avoids damaging your meter or getting incorrect readings.
Measure Incoming Power
Next, place the multimeter probes on the main terminals of the panel. The black probe goes to the neutral or ground terminal. The red probe touches the live terminal. Read the voltage shown on the multimeter screen. It should match your home’s supply voltage, usually around 120V or 240V. If the reading is much lower or zero, there may be a power problem.
Check Individual Circuits
To check each circuit, open the panel and carefully touch probes to the circuit breaker terminals. Test each breaker’s live terminal against the neutral or ground. You want to see the expected voltage for each circuit. No voltage or strange readings can mean a tripped breaker or wiring issue. Record your readings for future reference or repairs.
Testing Continuity
Testing continuity in an electrical panel helps find broken wires or faulty parts. It checks if electricity can flow through a circuit without interruption. This process is important for safety and fixing electrical problems early. A multimeter is the right tool to perform this test easily and accurately.
Set Multimeter To Continuity Mode
Turn the multimeter dial to the continuity setting. This mode often shows a sound wave or diode symbol. Continuity mode lets the meter beep if the circuit is complete. Always test the multimeter first by touching the probes together. The beep confirms the meter works correctly.
Test Breakers And Fuses
Switch off the main power before testing breakers or fuses. Remove the fuse or open the breaker carefully. Place the probes on both ends of the breaker or fuse. A beep means the part is good and allows current flow. No beep signals a broken fuse or faulty breaker that needs replacement.
Inspect Wiring Connections
Look for loose or damaged wires in the panel. Touch one probe to a wire end and the other to the next connection point. A beep shows the wire is intact and connected well. No beep suggests a break or bad connection. Tighten screws and fix any damaged wires to ensure safety.
Testing Resistance
Testing resistance in an electrical panel helps find problems like bad wires or poor connections. Resistance shows how much a material stops electric current. Low resistance means electricity flows easily. High resistance means a problem may exist. Use a multimeter to check resistance. This helps keep your electrical panel safe and working well.
Set Multimeter To Ohms
Turn your multimeter dial to the ohms (Ω) symbol. This setting measures resistance. Make sure the multimeter is off before changing settings. Connect the black probe to the COM port. Connect the red probe to the VΩ port. Now your multimeter is ready to test resistance.
Measure Wire Resistance
Touch the red and black probes to each end of the wire. The multimeter shows the wire’s resistance. A low number means the wire is good. A very high or infinite number means the wire is broken. Test all wires inside the panel to find any faults.
Check Ground Connections
Ground connections must have very low resistance. Place one probe on the ground wire. Place the other probe on a metal part of the panel. The multimeter should show near zero ohms. High resistance means a poor ground connection. Fix any bad ground to avoid electric shocks.
Interpreting Results
Interpreting the results from your multimeter is key to understanding the health of your electrical panel. Reading numbers alone does not tell the full story. You need to know what those numbers mean for safety and performance. This section breaks down the common readings and their implications. It helps you spot normal conditions and signs of trouble.
Normal Voltage Ranges
Standard voltage in most homes is between 110 and 120 volts for single-phase circuits. For three-phase panels, expect around 208 to 240 volts. Voltage slightly above or below these ranges is usually okay. Small fluctuations happen due to power demand changes. Consistent readings within these limits mean your panel is likely working well.
Signs Of Faulty Components
Voltage readings far outside the normal range signal issues. Very low voltage can mean loose wires or bad connections. High voltage might indicate a problem with the power supply or panel breakers. Unstable or flickering readings also suggest worn parts. These signs need attention to avoid damage or hazards.
When To Call A Professional
Unsafe voltage levels require expert help. Do not try to fix complex electrical issues alone. If your multimeter shows unusual or dangerous readings, contact a licensed electrician. Professionals have the tools and knowledge to handle repairs safely. Acting quickly can prevent fires and other risks.

Credit: www.youtube.com
Final Steps
After completing the electrical panel testing, you must follow some final steps. These steps ensure safety and keep a clear record of your work. Taking the right actions now prevents future problems and helps track panel health.
Reassemble Panel Cover
Carefully place the panel cover back in its position. Make sure no wires are pinched or exposed. Tighten all screws securely but do not overtighten. The cover protects you and the panel from dust and accidental contact.
Restore Power
Switch the main breaker back on to restore power. Check if all circuits work correctly. Listen for unusual sounds or look for flickering lights. If something seems wrong, turn off power again and inspect.
Document Test Results
Write down voltage and current readings from your multimeter. Note the date and any irregular findings. Keep this record safe for future reference. It helps track panel condition over time and supports maintenance.
Credit: mrelectric.com
Frequently Asked Questions
How Do I Safely Test An Electrical Panel?
Turn off the main power before testing. Wear insulated gloves and use a multimeter with proper settings. Avoid touching live wires to prevent shocks.
What Multimeter Setting Tests Electrical Panels?
Use the AC voltage setting to measure panel voltage. Set the dial to a range higher than the expected voltage for accuracy.
Can I Test Electrical Panels Without Professional Help?
Yes, with caution and proper tools. Follow safety guidelines strictly. If unsure, consult a licensed electrician to avoid hazards.
How To Check Circuit Breakers With A Multimeter?
Set multimeter to continuity mode. Test across breaker terminals. A beep indicates the breaker is functioning properly.
Conclusion
Testing an electrical panel with a multimeter is simple and safe. Always turn off the main power before starting. Check each wire carefully for voltage and continuity. Use the multimeter to spot any problems early. This helps avoid bigger electrical issues later.
Regular testing keeps your home’s wiring secure and working well. Take your time and follow all safety steps. Practice builds confidence and skill. Stay cautious and double-check your readings. This way, you can handle basic electrical checks on your own.