Are you having trouble with your golf cart motor and wondering if it’s working properly? Knowing how to test your golf cart motor with a multimeter can save you time and money.
You don’t need to be an expert or spend hours at the repair shop. In this guide, you’ll discover simple, step-by-step instructions to check your motor’s health quickly and accurately. By the end, you’ll feel confident spotting issues before they become bigger problems.
Keep reading to unlock the easy way to keep your golf cart running smoothly.
Tools And Materials Needed
Testing a golf cart motor with a multimeter requires the right tools and materials. Having these ready makes the process smooth and accurate. This section explains what you need before starting your test.
Choosing The Right Multimeter
Select a digital multimeter with clear readings. It should measure voltage, resistance, and continuity. Look for one with a range suitable for low voltage systems. A multimeter with auto-ranging helps avoid manual adjustments. Compact and easy-to-handle models work best for small parts. Make sure the probes are in good condition and fit well.
Additional Equipment
Besides the multimeter, gather a few extra items. Insulated gloves protect your hands during testing. A screwdriver set helps open motor covers safely. Use a wire brush or sandpaper to clean terminals. Carry a flashlight for better visibility in tight spaces. Keep a notebook and pen to record your findings.
Preparing The Golf Cart
Start by turning off the golf cart and removing the key. Check that the battery is fully charged before testing the motor with a multimeter. Connect the multimeter leads to the motor terminals to measure voltage or resistance accurately.
Safety Precautions
Before testing the golf cart motor, ensure safety first. Disconnect the battery to avoid electric shock. Wear gloves and safety glasses to protect yourself. Work in a dry area to prevent slipping or short circuits. Remove any loose clothing or jewelry that could get caught. Keep tools organized to avoid accidents. Double-check that the cart is off and cannot start unexpectedly.
Accessing The Motor
Locate the motor under the seat or near the rear wheels. Remove the cover or panel carefully using a screwdriver. Clear away dirt or debris around the motor area. Identify the motor terminals and wiring harness for testing. Use a flashlight if the space is dark to see clearly. Keep track of all screws and parts removed. Prepare the multimeter and cables before starting the test.
Testing Motor Continuity
Testing motor continuity is a key step in checking your golf cart motor’s health. Continuity testing shows if the motor’s electrical paths are complete. This means the motor windings are not broken or damaged. A multimeter helps you perform this test quickly and accurately.
When you test continuity, you check if electricity can flow through the motor. If the flow is interrupted, the motor may not work properly. This test can save time and money by spotting motor problems early.
Setting Multimeter To Continuity Mode
First, turn on your multimeter. Look for the continuity symbol. It looks like a sound wave or diode sign. Set the dial to this mode. This setting lets the multimeter beep when continuity is good.
Check the multimeter’s probes. They should be clean and connected well. Touch the two probes together. The meter should beep or show zero resistance. This means the multimeter is ready.
Checking Motor Windings
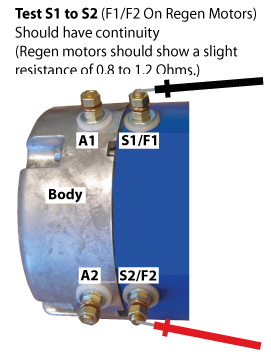
Next, find the motor terminals. These are points where wires connect to the motor. Place one probe on one terminal. Put the other probe on the next terminal. Listen for a beep or watch the screen.
A beep means the winding is good. No beep means a break in the winding. Test all pairs of terminals this way. This ensures all motor windings have continuity. If any winding fails, the motor needs repair or replacement.
Credit: golfdeft.com
Measuring Motor Resistance
Testing a golf cart motor with a multimeter helps check its resistance. Measure the motor’s terminals to see if the motor coil is good or damaged. This simple test shows if the motor needs repair or replacement.
Measuring the resistance of a golf cart motor helps find problems inside the motor. Resistance tells how much the motor resists electric current. This test shows if the motor windings are good or damaged. Low or high resistance means a problem may exist. A multimeter is the tool used for this test.
Testing resistance takes just a few minutes. It is safe and does not need the motor to run. This test can save money by finding issues early. Read the steps below to measure motor resistance correctly.
Adjusting Multimeter Settings
Start by turning on the multimeter. Set it to the resistance mode, often marked as “Ω”. Choose a range that can measure low resistance, like 200 ohms. If the meter is auto-ranging, it will find the right range by itself.
Make sure the multimeter probes are clean and working. Touch the two probes together to check for zero resistance. This step ensures accurate readings. If the meter does not show zero, replace the batteries or fix the meter.
Interpreting Resistance Values
Connect the probes to the motor terminals. Watch the number shown on the multimeter screen. A healthy motor usually has low resistance between windings. Resistance values near zero or very high show trouble. Zero means a short circuit. Infinite resistance means an open winding.
Compare your readings with the motor’s manual for exact numbers. Slight differences are normal but big changes signal motor damage. Testing resistance often helps find faults early. Note down your results for future checks.
Testing Motor Voltage
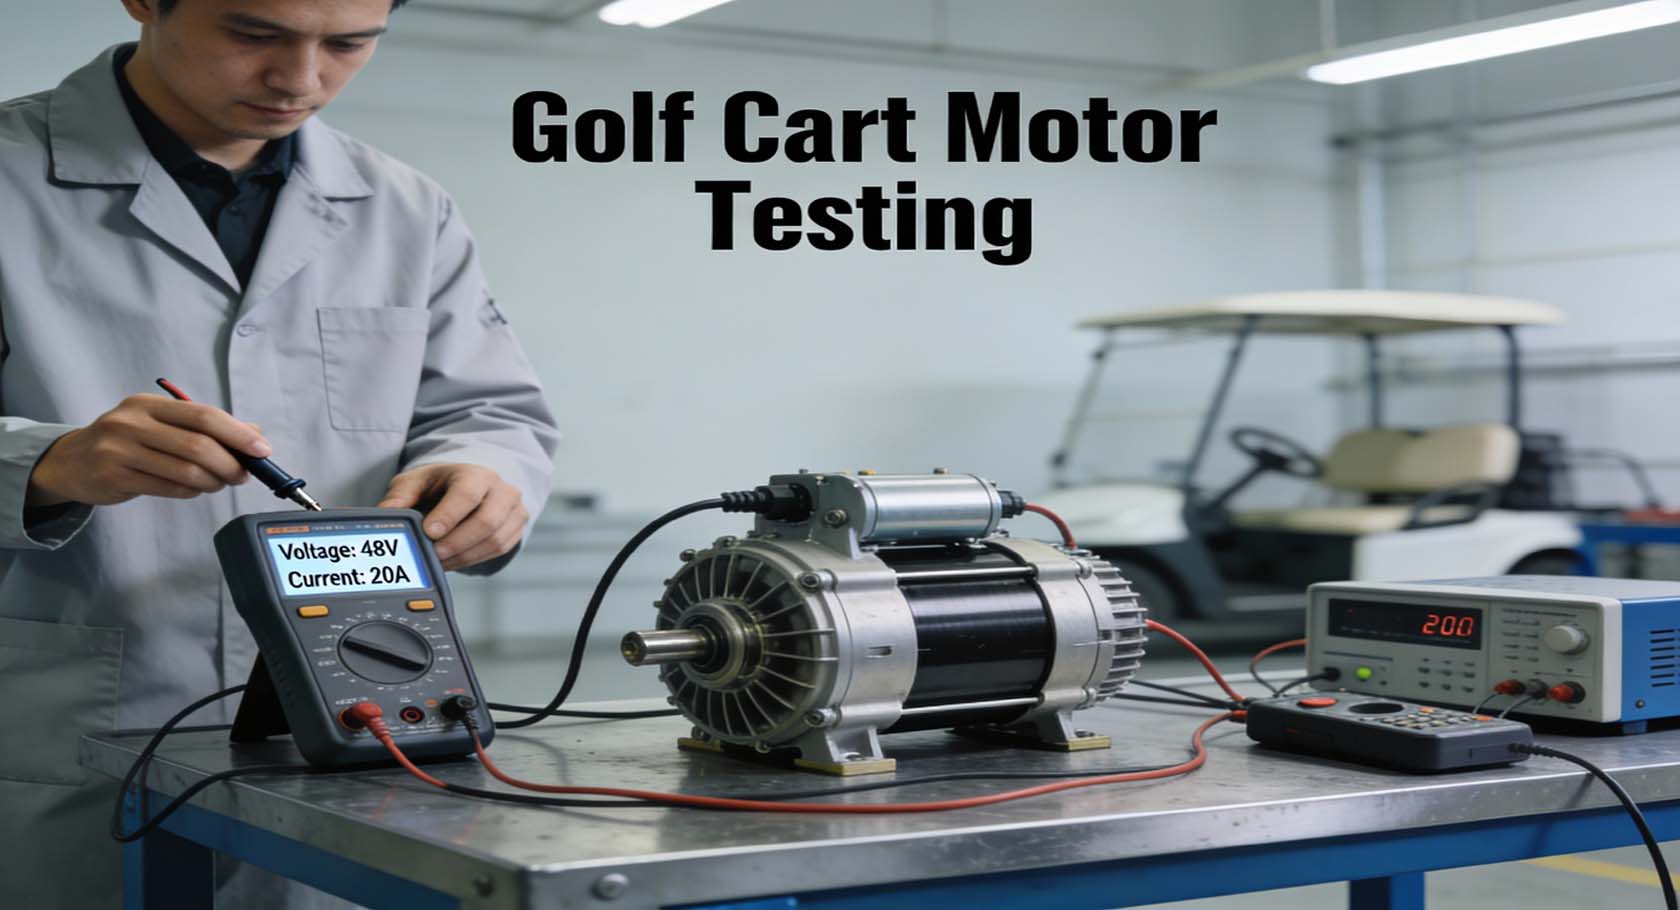
Testing motor voltage helps find electrical issues in a golf cart motor. Use a multimeter to measure voltage at motor terminals. This shows if the motor gets power and works correctly.
Connecting Multimeter To Power Source
Start by turning off the golf cart to stay safe. Set your multimeter to the DC voltage setting. Find the battery terminals or the motor’s power wires. Connect the red probe to the positive terminal. Place the black probe on the negative terminal. Make sure the probes touch metal parts only. Hold them steady to get a clear reading. This setup checks the voltage feeding the motor.
Reading Voltage Levels
Turn the golf cart power on carefully. Look at the multimeter display for voltage numbers. Normal motor voltage usually matches the battery rating. For example, a 48V cart should show near 48 volts. Lower voltage means weak power or battery issues. If the reading is zero, check your connections again. Consistent voltage means the motor gets enough power to run.
Credit: evdrives.com
Diagnosing Common Motor Issues
Diagnosing common motor issues helps keep your golf cart running smoothly. A multimeter is a useful tool to find problems inside the motor. It checks the motor’s electric parts for faults. Simple tests can show if wires or coils are damaged. Understanding these issues saves time and money on repairs.
Focus on two main problems: open circuits and short circuits. Both affect the motor’s performance. You can detect them quickly with a multimeter. Let’s see how to find these issues step-by-step.
Identifying Open Circuits
An open circuit means the electric path is broken. Current cannot flow through the motor. This causes the motor to stop working or run weakly. Use a multimeter set to continuity or resistance mode. Place the probes on the motor wires or connections. If the multimeter shows no reading or infinite resistance, there is an open circuit. Check each wire, terminal, and coil for breaks. Fix or replace the broken parts to restore the circuit.
Detecting Short Circuits
A short circuit happens when wires touch where they should not. This creates a low-resistance path. It can cause the motor to overheat or blow fuses. Set the multimeter to resistance mode. Test between motor terminals and the motor body (ground). A very low resistance reading means a short circuit is present. Look for damaged insulation, burnt wires, or metal touching wires. Repair or isolate these areas to stop the short circuit.
Final Steps And Maintenance Tips
After testing your golf cart motor with a multimeter, final steps and proper care help keep it working well. Taking time to reassemble parts carefully prevents damage. Regular maintenance extends the motor’s life and improves performance.
Reassembling Components
Start by placing all parts back in their correct spots. Tighten screws and bolts firmly but do not overtighten. Check wiring connections to ensure they are secure and not loose. Make sure no wires are pinched or damaged. Clean any dirt or debris before closing the motor cover. Double-check everything looks right before powering the cart on.
Preventive Care For Motor Longevity
Keep the motor dry and clean to avoid corrosion. Inspect wiring and connectors regularly for wear or damage. Lubricate moving parts as recommended in the owner’s manual. Avoid running the motor in extreme heat or wet conditions. Charge batteries properly to prevent motor strain. Schedule regular checks to catch problems early. Simple care helps your golf cart motor last longer and run smoother.

Credit: www.youtube.com
Frequently Asked Questions
How Do I Test A Golf Cart Motor With A Multimeter?
To test a golf cart motor, set your multimeter to the resistance setting. Measure the motor windings’ resistance. Low or zero readings indicate good windings, while infinite or very high readings suggest damage or breaks.
What Multimeter Setting Is Best For Motor Testing?
Use the ohms (Ω) or resistance setting on your multimeter. It helps measure the continuity and resistance in the motor windings, indicating their condition accurately.
How Can I Identify A Bad Golf Cart Motor Winding?
A bad winding shows infinite or very high resistance on the multimeter. This means a break or open circuit inside the winding, signaling the need for repair or replacement.
Can A Multimeter Detect All Golf Cart Motor Problems?
No, a multimeter detects electrical issues like winding continuity but not mechanical problems. For full diagnosis, combine electrical tests with physical inspections.
Conclusion
Testing a golf cart motor with a multimeter helps find electrical problems fast. It saves time and money on repairs. Knowing how to check voltage, continuity, and resistance is useful. This simple skill keeps your golf cart running smoothly. Always follow safety steps during testing.
Practice these checks to feel confident next time. A working motor means better rides and less hassle. Try testing your motor today and see the difference it makes.