Is your laptop battery draining faster than usual? Before rushing to buy a new one, you can check its health yourself.
Testing your laptop battery with a multimeter is easier than you think. You don’t need to be a tech expert or spend money on expensive tools. In this guide, you’ll learn simple steps to find out if your battery is still good or if it’s time for a replacement.
Keep reading, and take control of your laptop’s power right now!
Tools Needed
Testing a laptop battery with a multimeter requires a few basic tools. These tools help you check the battery’s health safely and accurately. Gathering everything before starting saves time and avoids mistakes.
Multimeter
The multimeter is the main tool for this test. It measures voltage, current, and resistance. A digital multimeter is easy to read and use. Set it to measure DC voltage for the battery test.
Safety Gloves
Wear safety gloves to protect your hands. Laptop batteries contain chemicals that can be harmful. Gloves prevent accidental contact with battery terminals or sharp parts.
Screwdriver Set
You need screwdrivers to open the laptop case. Different laptops use different screws. A small Phillips or flathead screwdriver usually works best.
Battery Connector Or Clips
Battery connectors or clips help connect the multimeter probes. They keep the probes steady and avoid slipping. This ensures a safer and more accurate reading.
Notebook And Pen
Use a notebook and pen to write down readings. Recording voltage helps track battery condition over time. It also helps compare with the battery’s rated voltage.

Credit: www.youtube.com
Preparing Your Laptop Battery
Preparing your laptop battery before testing with a multimeter is important. It helps get accurate results and protects your device. Taking simple steps can make the process smooth and safe.
Start by turning off your laptop completely. Remove the power cable and disconnect any devices attached to it. This prevents any electrical interference during the test.
Remove The Battery Safely
Find the battery release latch or screws on the bottom of your laptop. Gently slide the latch or unscrew to remove the battery. Handle the battery carefully to avoid damage or short circuits.
Clean Battery Contacts
Use a soft cloth or cotton swab to clean the metal contacts on the battery. Dirt or dust can cause wrong readings on the multimeter. Ensure the contacts are dry before testing.
Check Battery Voltage Rating
Look for the voltage number on the battery label. This value is important to compare with your multimeter reading. Knowing the correct voltage helps you decide if the battery is healthy.
Setting Up The Multimeter
Setting up the multimeter correctly is the first step to test your laptop battery. A proper setup ensures accurate readings and protects both you and your device. Take your time to prepare the multimeter before measuring the battery voltage.
Selecting The Correct Mode
Turn on your multimeter and look for the mode dial. Choose the DC voltage setting, often marked as “V” with a straight line above it. Laptop batteries supply direct current, so this mode fits best. Set the range to a value higher than your battery voltage. Most laptop batteries range from 10 to 15 volts, so select 20V if available.
Calibrating The Device
Check if your multimeter needs calibration before use. Some models require zeroing or adjusting the needle to zero. Use the test leads to short the probes and see if the meter reads zero volts. If not, adjust the dial or press the calibration button. Calibrating removes errors and improves accuracy. Always calibrate in a stable environment, away from strong electrical interference.
Measuring Battery Voltage
Testing a laptop battery with a multimeter helps check its voltage. Connect the multimeter probes to the battery terminals carefully. This shows if the battery holds enough power to work properly.
Locating Battery Terminals
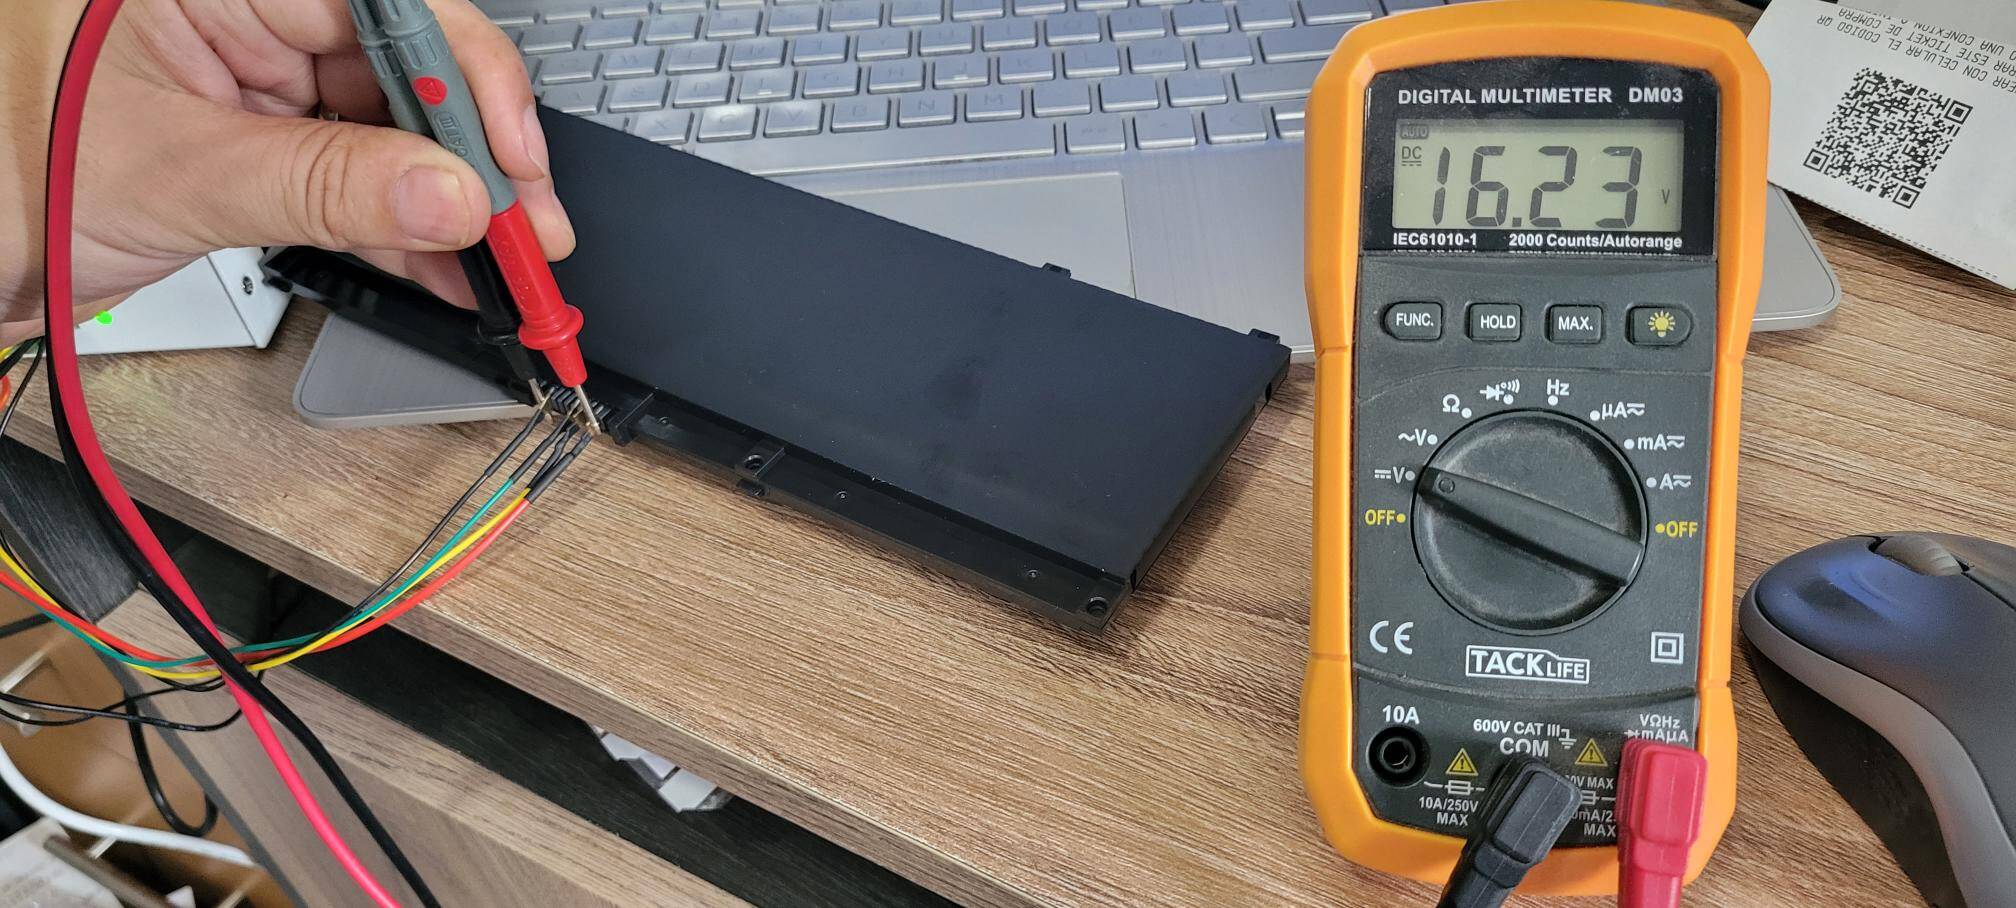
Start by finding the battery terminals on your laptop battery. These are small metal contacts where the battery connects to the laptop. Usually, they are marked with plus (+) and minus (-) signs. The plus sign shows the positive terminal, and the minus sign shows the negative terminal. If your battery is inside the laptop, you may need to remove the back cover carefully. Always make sure the laptop is turned off before you touch the battery.
Taking Voltage Readings
Set your multimeter to the DC voltage mode. Connect the red probe to the positive terminal and the black probe to the negative terminal. Read the number shown on the multimeter display. This number tells you the voltage of your laptop battery. A fully charged battery usually shows a voltage near its rated value. If the voltage is much lower, the battery might be weak or damaged. Always handle the probes carefully to avoid short circuits. Write down the voltage reading for future reference.
Interpreting Voltage Results
After measuring your laptop battery voltage with a multimeter, understanding the results is key. Voltage readings help you know the battery’s health and performance. These numbers show if the battery holds charge or needs replacement. Let’s explore what different voltage levels mean for your laptop battery.
Normal Voltage Range
A healthy laptop battery usually shows voltage close to its rated value. Most laptop batteries have a voltage between 10.8V and 12.6V. When the battery is fully charged, expect readings near 12.6V. If the battery is partially charged, voltage may be around 11.5V to 12.0V. Voltage below 10.8V often means the battery is running low or discharging.
Checking the voltage at rest (when the laptop is off) gives the most accurate reading. Voltage in this normal range means your battery is working well. This range varies slightly depending on the battery type and model.
Signs Of Battery Issues
Voltage readings below the normal range can signal problems. If voltage drops under 10V, the battery may be damaged or worn out. Such low voltage often causes the laptop to shut down suddenly. Another sign is fluctuating voltage, which shows instability in battery power. This could mean internal damage or poor connections.
Also, if the voltage does not increase after charging, the battery may be failing. These signs suggest the battery needs repair or replacement. Regular voltage checks help catch issues early and keep your laptop running smoothly.
Testing Battery Under Load
Testing a laptop battery under load gives a clear view of its real condition. Measuring voltage without load shows only part of the story. A load test reveals how the battery performs when the laptop is working hard.
This test helps find problems like weak cells or poor capacity. It shows if the battery can hold power during normal use. Use a multimeter to measure voltage while the battery is under load. This method gives more accurate results than a simple voltage check.
Simulating Battery Load
To simulate a load, connect a device that uses power from the battery. A small light bulb or resistor works well. The load should draw current similar to what the laptop uses. This creates real conditions for testing the battery.
Connect the load in parallel with the battery terminals. Use caution to avoid short circuits. Turn on the load and let it run for a few minutes. This step stresses the battery, showing how it handles power draw.
Observing Voltage Drop
Use the multimeter to measure the battery voltage during the load test. Watch the voltage closely as the load runs. A healthy battery keeps voltage stable with little drop.
If voltage falls quickly or drops below the rated level, the battery may be weak. Note the voltage reading right after applying the load. Then check the voltage again after a few minutes. A steady drop signals aging or damaged cells.
Safety Tips During Testing
Testing a laptop battery with a multimeter requires care. Safety is very important to avoid damage or injury. Following simple safety rules keeps you and your device safe.
Always prepare your workspace before testing. A clean, dry area reduces risks. Keep your tools and hands dry to prevent short circuits.
Wear Protective Gear
Use safety glasses to protect your eyes. Gloves can protect your hands from electric shocks. These simple protections help you stay safe during testing.
Turn Off And Unplug The Laptop
Always switch off the laptop before testing the battery. Unplug the laptop from any power source. This stops electric current flow and lowers risk of shock.
Check Multimeter Settings
Set the multimeter to the correct voltage range. Using the wrong setting can damage the meter or battery. Double-check settings before touching any terminals.
Avoid Metal Contact
Do not let multimeter probes touch each other. Avoid touching metal parts with your fingers. This can cause sparks or short circuits that harm you or the battery.
Handle Battery Carefully
Do not bend or puncture the battery. Rough handling can cause leaks or fires. Hold the battery gently and test only the terminals.
Credit: www.laptopu.ro
Troubleshooting Common Problems
Troubleshooting common problems during a laptop battery test with a multimeter helps ensure accurate results. Small errors can cause wrong readings. This section guides through typical issues and their fixes.
Check Multimeter Settings
Set the multimeter to the correct voltage range. Use DC voltage mode, not AC. A wrong setting can show zero or fluctuating numbers. Always start with a higher voltage range and adjust downward if needed.
Inspect Battery Terminals
Dirty or corroded terminals give false readings. Clean the battery contacts gently with a soft cloth or a cotton swab dipped in rubbing alcohol. Make sure the terminals are dry before testing again.
Ensure Proper Probe Contact
Firm contact between the probes and battery terminals is essential. Loose or shaky connections cause unstable readings. Hold probes steady or use clips to keep them in place during measurement.
Test Battery Outside Laptop
Sometimes, the laptop’s circuit affects the reading. Remove the battery and test it separately. This approach avoids interference from the laptop’s power system.
Verify Battery Charge Level
A very low or dead battery may show zero volts. Charge the battery partially before testing. This step helps confirm if the battery holds any charge.

Credit: electronics.stackexchange.com
Frequently Asked Questions
How Do I Test Laptop Battery Voltage With A Multimeter?
To test laptop battery voltage, set the multimeter to DC voltage mode. Connect the red probe to the positive terminal and the black probe to the negative terminal. Read the voltage on the display and compare it with the battery’s rated voltage to check its health.
Can A Multimeter Detect Laptop Battery Problems?
Yes, a multimeter can detect common battery issues like low voltage or no charge. It helps identify if the battery is faulty or needs replacement by measuring voltage and continuity accurately.
What Is The Ideal Voltage Range For A Laptop Battery?
Most laptop batteries have a voltage range between 10. 8V and 14. 8V, depending on the model. Voltage below this range often indicates a weak or failing battery that may require replacement.
How Often Should I Test My Laptop Battery With A Multimeter?
It’s best to test your laptop battery every 3 to 6 months. Regular checks help maintain battery health and avoid unexpected power failures by spotting issues early.
Conclusion
Testing your laptop battery with a multimeter helps you know its health. It shows if the battery holds the right voltage or needs replacement. This simple tool saves time and money by avoiding guesswork. Regular checks keep your laptop running smoothly and prevent sudden shutdowns.
Follow the steps carefully for accurate results. This skill is useful for anyone who uses a laptop daily. Try it yourself and stay in control of your device’s power.