Testing a CDI (Capacitor Discharge Ignition) box with a multimeter can save you time, money, and frustration. For anyone who works with motorcycles, ATVs, boats, or small engines, understanding this process is essential. If your engine won’t start or misfires, the CDI box is often a suspect. Yet, many people replace it without testing, wasting money on unnecessary parts. Learning how to check a CDI box yourself helps you diagnose problems more accurately and avoid common mistakes.
This guide explains everything you need to know, from what a CDI box is to the exact steps for testing it with a multimeter. You’ll find practical advice, common pitfalls, real-world examples, and tips that even experienced mechanics sometimes miss.
Whether you’re a beginner or have some knowledge, this article gives you the confidence and detail you need to get reliable results.
What Is A Cdi Box And Why Does It Matter?
The CDI box is a type of ignition module found in many small engines and motorcycles. Its main job is to store and quickly release an electric charge to the ignition coil, which then fires the spark plug. This process is what ignites the fuel in your engine.
A faulty CDI box can cause:
- Hard starting or engine not starting at all
- Misfires or rough running
- Sudden engine shutdowns
- Weak or no spark
Diagnosing a CDI failure can be tricky because symptoms often look like other electrical problems. That’s why proper testing is crucial.
Tools And Preparation: What You Need Before Testing
Testing a CDI box is not complicated if you have the right tools and take proper safety steps.
Tools you need:
- Digital multimeter (with diode testing and resistance settings)
- Wiring diagram for your specific engine or motorcycle
- Screwdrivers (to remove covers and access wiring)
- Pen and paper (to record readings)
- Protective gloves (optional but recommended)
- Service manual (for reference)
Safety precautions:
- Always turn off the ignition and disconnect the battery before removing the CDI box.
- Never touch exposed wires with the engine running.
- Work in a dry, well-lit area.
Understanding Cdi Box Wiring And Pins
CDI boxes come in various shapes and sizes. The number of wires or pins can range from 4 to 8, depending on the engine model.
Common CDI box pinouts:
- Input from stator (AC or pulsed voltage)
- Ignition coil output
- Ground
- Kill switch
- Power supply (sometimes)
Check your wiring diagram carefully. Pin locations may differ even between similar models. Label or photograph the connectors before unplugging them. This step prevents confusion when reconnecting everything later.
Example: Typical 5-pin Cdi Box Wiring
- Pin 1: Ground
- Pin 2: AC input from stator
- Pin 3: Trigger (from pickup coil)
- Pin 4: Ignition coil output
- Pin 5: Kill switch
Not all boxes are the same. Always confirm the pinout for your specific engine.
How The Cdi Box Works: The Basics
The CDI box uses a capacitor to store electricity. When triggered, it quickly releases this charge to the ignition coil, which boosts the voltage and sends it to the spark plug. The timing of this release is controlled by signals from the engine’s pickup coil or trigger.
Why is this important for testing?
- You’re mostly checking for continuity, resistance, and proper diode function.
- CDI boxes do not contain moving parts but have sensitive electronic components.
Knowing this helps you understand what your multimeter readings mean.
Main Symptoms Of A Faulty Cdi Box
Before testing, it’s smart to review the signs of a bad CDI box. These include:
- No spark at the spark plug: The engine cranks but won’t start.
- Intermittent misfire: Spark appears and disappears at random.
- Sudden engine cut-off: The engine shuts off without warning.
- Weak spark: The spark exists but is too weak for ignition.
- Hard starting: Engine takes a long time to fire up.
These symptoms can also be caused by a bad ignition coil, stator, or wiring issue. Testing the CDI box helps you rule out or confirm it as the problem.
Step-by-step: How To Test A Cdi Box With A Multimeter
Now, let’s walk through the actual testing process. You’ll find details, practical tips, and common mistakes to avoid.
1. Locate And Remove The Cdi Box
- Find the CDI box on your engine. It’s usually a small black or silver box with multiple wires or a plug.
- Use the wiring diagram to confirm you have the right component.
- Disconnect the CDI box from the wiring harness. Label the wires or take a photo for easy reinstallation.
Tip: If your CDI is hard to access, consult your service manual for guidance.
2. Visually Inspect The Cdi Box
Before using the multimeter, do a quick visual check:
- Look for burned spots, melted plastic, or corrosion on terminals.
- Sniff for any burnt smell (a sign of internal failure).
- Check for loose or broken wires.
Physical damage almost always means the CDI box is faulty.
3. Set Your Multimeter For Testing
- Turn your multimeter to the resistance (ohms) setting.
- If available, set it to the diode test mode as well.
Why both settings? Some CDI circuits use diodes, which only allow current to flow one way. Resistance and diode tests together give you a clearer picture.
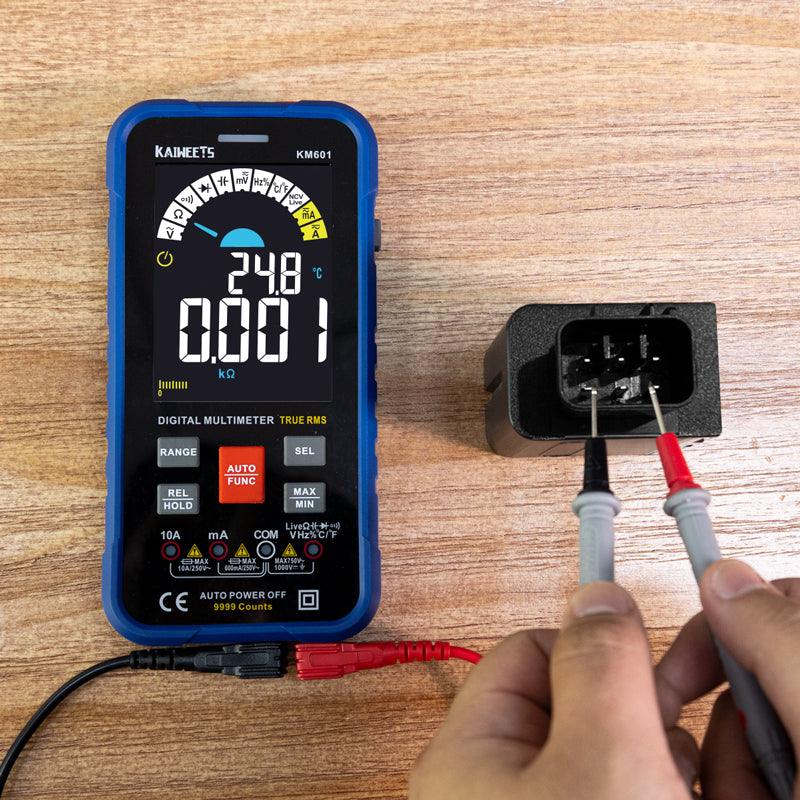
4. Test Resistance Between Pins
Now, using your wiring diagram, check the resistance between various pin combinations.
Common resistance readings:
- Between ground and stator input: Often between 50–600 ohms.
- Between trigger and ground: Typically 100–400 ohms.
- Between coil output and ground: Can vary widely.
Steps:
- Touch one multimeter lead to the ground pin, the other to the stator or trigger pin.
- Record the reading.
- Repeat for all pin combinations listed in your service manual.
If the reading is 0 ohms (short circuit) or infinite (open circuit), the CDI box is likely faulty.
Example resistance reading table:
| Pin 1 | Pin 2 | Expected Resistance (Ohms) | Result Interpretation |
|---|---|---|---|
| Ground | Stator Input | 50–600 | Pass if within range |
| Ground | Trigger | 100–400 | Pass if within range |
| Coil Output | Ground | Variable | Check manual |
Non-obvious insight: Some aftermarket CDI boxes have slightly different resistance values. Always check the specs for your exact model.
5. Perform Diode Test (if Your Multimeter Has It)
- Switch your multimeter to diode test mode (if available).
- Place the red lead on the positive side of a suspected diode circuit, black on the negative.
- You should see a reading in one direction and “OL” (open loop) in the other.
This test checks if the diodes inside the CDI are working. A reading in both directions means the diode is shorted; no reading means it’s open.
Example of diode test outcomes:
| Pin Combination | Forward Reading | Reverse Reading | Diagnosis |
|---|---|---|---|
| Stator Input – Ground | 0.5–0.7 V | OL | Normal |
| Stator Input – Ground | Both OL or both 0 | Both OL or both 0 | CDI likely bad |
6. Compare Results With Service Manual
It’s important to compare your readings with the official values in your service manual or the manufacturer’s guide. This step confirms if the CDI box is within factory specifications.
What if you don’t have a manual? Look online for your model’s values, or use typical ranges as a rough reference.
7. Reinstall And Test Engine
After testing, reconnect the CDI box. Try starting the engine. If readings were normal but the engine still doesn’t start, the problem may be elsewhere (wiring, coil, stator, or switches).
Non-obvious insight: Sometimes, a CDI box can “pass” basic resistance tests but still fail under real-world voltage. Swapping with a known good CDI is the final check.

Credit: www.youtube.com
Other Methods For Testing Cdi Boxes
While a multimeter is the main tool, there are other ways to confirm CDI health.
Swap Test
If you have access to a known good CDI box (same model), swap it in. If the engine runs, the original CDI is likely faulty.
Spark Test
Check for spark at the plug while cranking the engine. No spark (after verifying coil and stator) points to CDI failure.
Professional Testers
Some shops use specialized CDI testers that apply load and simulate real engine conditions. These give more reliable results but are expensive.
Key point: For most DIYers, a multimeter plus a swap test gives enough confidence.
Common Mistakes When Testing A Cdi Box
Avoid these errors for accurate results:
- Testing with the CDI box still connected to the wiring harness. Always disconnect before testing.
- Forgetting to compare with the correct wiring diagram. Pin locations can change between models.
- Not recording readings. Write down every result for later comparison.
- Ignoring obvious physical damage. If you see burn marks, replace the CDI—no test is needed.
- Using the wrong test setting on the multimeter. Check that you’re using resistance or diode mode as required.
Practical Examples: Real-world Scenarios
Example 1: Motorcycle With No Spark
A Honda CG125 won’t start. After checking the spark plug and coil, you remove the CDI box and test resistance:
- Ground to stator input: 100 ohms (within range)
- Ground to trigger: 0 ohms (short circuit)
Diagnosis: The trigger circuit in the CDI is shorted. Replace the CDI box.
Example 2: Atv Intermittent Misfire
An ATV runs fine when cold but misfires when hot. Resistance tests on the cold CDI are normal, but after heating with a hair dryer, resistance jumps to infinity.
Diagnosis: The CDI box has a heat-sensitive internal fault. Replace it.
Example 3: Scooter With Weak Spark
A scooter starts but runs rough. Multimeter tests are all normal. Swapping with a good CDI fixes the problem.
Diagnosis: Sometimes, CDI boxes can fail in ways that basic tests miss. If symptoms persist, a swap test is the most reliable backup.
Comparing Cdi Box Problems With Other Ignition Issues
It’s easy to blame the CDI box when an engine won’t start, but other parts can fail too.
Here’s a comparison:
| Symptom | Likely Cause | Testing Method |
|---|---|---|
| No spark | CDI, ignition coil, stator, wiring | Test each part; swap CDI for final check |
| Intermittent spark | CDI (heat sensitive), loose wiring | Heat test, visual inspection |
| Weak spark | Ignition coil, low battery, CDI | Measure coil resistance, battery voltage |
Credit: kaiweets.com
Advanced Tips For Accurate Cdi Box Testing
- Test when cold and hot: Some CDI failures only appear when the box heats up during engine use.
- Check voltage drop: Use your multimeter to measure for unexpected voltage drops across connectors, which can mimic CDI failure.
- Inspect grounds: Poor grounding causes many ignition issues. Clean all ground connections before replacing parts.
- Beware of “universal” CDI boxes: Not all aftermarket CDI units are compatible, even if the connectors fit.
What To Do If Your Cdi Box Passes All Tests But Engine Still Fails
- Double-check the ignition coil, stator, and pickup coil.
- Inspect all wiring for cuts, corrosion, or loose connections.
- Test the kill switch (a stuck switch can prevent starting).
- Confirm that the spark plug is correct and in good condition.
If all else fails, consult a professional or refer to the engine’s service manual.
The Cost And Benefit Of Diy Cdi Testing
Testing a CDI box yourself can save $50–$200 or more in shop fees and unnecessary parts. You also learn more about your engine, making future repairs easier.
Statistics: In a survey of small engine repair shops, up to 30% of CDI boxes replaced were actually working fine. The real problem was often wiring or coil-related.
When To Replace The Cdi Box
Replace the CDI box if:
- Visual inspection shows damage
- Resistance or diode tests are far from normal
- Swap test confirms failure
- Symptoms persist after checking all other components
Do not replace the CDI “just in case”—test first.

Credit: www.advrider.com
Frequently Asked Questions
What Does A Cdi Box Do In My Engine?
The CDI box stores and releases electrical energy to the ignition coil. This creates the spark needed to ignite the fuel in your engine.
Can I Test A Cdi Box With Just A Basic Multimeter?
Yes, you can test for resistance and some diode functions. However, some failures only show up under real engine loads, so a swap test may still be needed.
What Are The Signs Of A Completely Failed Cdi Box?
Common signs are no spark, sudden engine stop, or engine not starting at all, even though other electrical parts test fine.
Is It Safe To Open A Cdi Box And Try To Repair It?
It’s not recommended. CDI boxes are sealed units with sensitive electronics. Opening them often does more harm than good.
Where Can I Find Resistance Values For My Specific Cdi Box?
Check your engine’s service manual or manufacturer website. Reliable values can also be found on Wikipedia and other trusted technical sites.
Testing your CDI box with a multimeter is a practical skill that can help you fix ignition problems and avoid wasting money. By following these steps, comparing your results, and understanding what each reading means, you can make a clear decision about whether your CDI needs replacing or if you should look elsewhere for the fault.
Take your time, double-check your work, and enjoy the confidence that comes from solving the problem yourself.