Are you having trouble starting your diesel engine on cold mornings? Your glow plugs might be the culprit.
Knowing how to test glow plugs with a multimeter can save you time and money by pinpointing the problem early. In this guide, you’ll learn simple steps to check your glow plugs yourself, even if you’re not a mechanic. Keep reading to discover how a few quick tests can help you avoid costly repairs and get your engine running smoothly again.
Tools Needed
Testing glow plugs needs the right tools to get accurate results. Using proper equipment saves time and prevents errors. Here is a list of tools you must have before starting the test.
Choosing The Right Multimeter
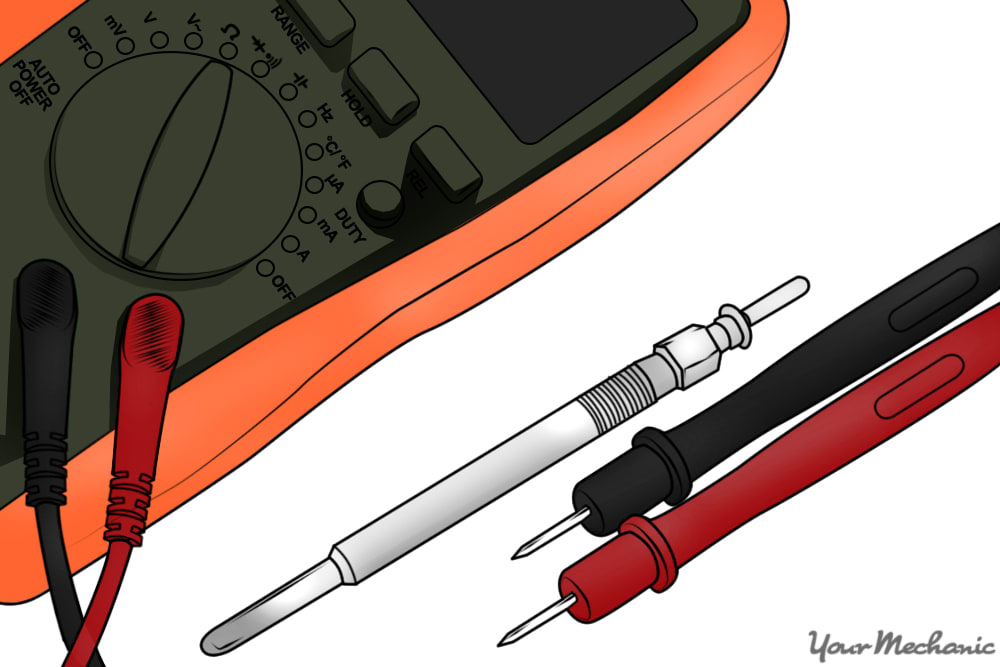
Select a digital multimeter with a resistance (ohms) measurement feature. The multimeter should have clear readings and a simple interface. Choose one with a range that covers low resistance values. A backlit screen helps in low light areas. Make sure the probes are in good condition for safe testing.
Additional Equipment
Besides a multimeter, keep a few extras ready. Use insulated gloves to protect your hands from heat. A screwdriver helps remove glow plugs if needed. Have a clean cloth to wipe dirt from the plugs. A vehicle manual is useful to find glow plug locations and specifications.

Credit: www.wikihow.com
Safety Precautions
Testing glow plugs with a multimeter needs care and attention. Safety is key to avoid injury or damage. Follow these safety steps before starting your test.
Working With Electrical Components
Turn off the engine and remove the key before testing. Disconnect the battery to stop electric flow. Avoid touching wires or terminals with wet hands. Use insulated tools to prevent shocks. Check the multimeter settings before use. Never test glow plugs while the engine is hot.
Protective Gear Tips
Wear safety glasses to protect your eyes from sparks. Use gloves to avoid electric shocks and dirt. Wear long sleeves to protect your skin. Keep hair and loose clothes away from moving parts. Work in a well-lit area for clear visibility. Have a fire extinguisher nearby for emergencies.
Preparing The Vehicle
Start by turning off the vehicle and letting the engine cool down. Disconnect the glow plug wires carefully to avoid damage. Ensure your multimeter is set to the correct setting before testing each glow plug.
Locating Glow Plugs
Start by finding the glow plugs under the hood. Glow plugs are usually near the engine’s cylinder head. Look for small, metal rods with electrical connectors. Consult your vehicle’s manual for exact locations. Knowing where the glow plugs sit helps you test them correctly.
Disconnecting Battery
Always disconnect the vehicle’s battery before testing glow plugs. This step prevents electrical shocks and short circuits. Use a wrench to remove the negative terminal first. Secure the cable away from the battery. Safety comes first when working with electrical components.

Credit: www.youtube.com
Testing Resistance
Testing the resistance of glow plugs is a key step in diagnosing their condition. Resistance tells if the glow plug can heat properly. A multimeter helps check this by measuring the electrical resistance.
This test is simple and quick. It helps find out if the glow plug is good or needs replacing. Let’s see how to test the resistance correctly.
Setting Multimeter To Ohms
Turn on the multimeter first. Set the dial to the ohms symbol (Ω). This measures electrical resistance. Choose a low range, usually 0-20 ohms, for glow plugs. This setting gives accurate readings for small resistance values.
Check the multimeter leads. The black lead goes into the common (COM) port. The red lead goes into the port marked for resistance or voltage.
Measuring Glow Plug Resistance
Remove the glow plug from the engine. Clean the terminals if dirty. Place the black lead on the glow plug’s metal body. Touch the red lead to the glow plug’s terminal.
Hold the leads steady. Read the resistance value on the multimeter screen. Avoid moving the leads during measurement. This keeps the reading stable and accurate.
Interpreting Resistance Values
Normal glow plug resistance ranges from 0.5 to 2 ohms. A value inside this range means the glow plug is likely good. A reading of zero or close to zero shows a short circuit. This means the glow plug is faulty.
If the resistance is very high or infinite, the glow plug is broken inside. It has an open circuit and will not heat. Replace any glow plug with abnormal resistance values to avoid engine problems.
Checking Voltage Supply
Checking the voltage supply is a key step to test glow plugs. It shows if the glow plug gets enough power to work. Without the right voltage, glow plugs cannot heat properly. This section explains how to check voltage using a multimeter. It helps find electrical issues before checking the glow plug itself.
Setting Multimeter To Voltage
First, turn on your multimeter. Set it to measure DC voltage. This mode usually shows as “V” with a straight line. Choose a range higher than 12 volts, as vehicle systems use 12V. This setting prepares the multimeter for accurate voltage reading.
Testing Voltage At Glow Plug Connector
Locate the glow plug connector on the engine. Connect the multimeter’s red probe to the positive terminal. Touch the black probe to a good ground, like the engine block. Turn the ignition key to the “on” position but do not start the engine. Check the voltage reading on the multimeter display. It should read close to 12 volts. If voltage is low or zero, power is not reaching the glow plug. This may mean a blown fuse or wiring problem.
Identifying Faulty Glow Plugs
Identifying faulty glow plugs is key to keeping a diesel engine running smoothly. Glow plugs help start the engine by heating the air in the cylinders. If they fail, the engine may not start well or may run poorly. Finding bad glow plugs early saves time and money on repairs.
Testing glow plugs with a multimeter gives clear results. It shows if a glow plug has the right resistance or if it is broken. This section explains how to spot signs of bad glow plugs and confirm issues with a multimeter.
Signs Of A Bad Glow Plug
A bad glow plug causes engine starting problems. The engine may crank but not start easily. You might smell fuel or see black smoke at startup. The engine may run rough or stall in cold weather. Warning lights on the dashboard can also indicate glow plug faults. Listening for unusual noises during startup helps detect issues too.
Confirming With Multimeter Results
Use a multimeter to measure glow plug resistance. Set the multimeter to the ohms setting. Disconnect the glow plug wire and touch the probes to the plug terminals. A good glow plug shows low resistance, usually below 1 ohm. High or infinite resistance means the glow plug is faulty. Compare results to your vehicle’s manual for exact values. This test confirms if a glow plug needs replacement.
Tips For Maintenance
Maintaining glow plugs extends their life and keeps your engine running smoothly. Simple care steps prevent damage and costly repairs. Check glow plugs regularly and handle replacements carefully for best results.
Regular Testing Intervals
Test glow plugs every 10,000 to 15,000 miles. This helps catch problems early. Use a multimeter to check resistance and continuity. Consistent testing avoids sudden engine start failures. Mark your calendar to remember testing dates.
Replacing Glow Plugs Safely
Always replace glow plugs when tests show faults. Let the engine cool before removing plugs. Use the right tools to avoid damage. Tighten new plugs to the correct torque. Avoid overtightening; it can break the plug or threads. Wear gloves to protect your hands from heat and dirt.
Credit: www.yourmechanic.com
Frequently Asked Questions
How Do You Test Glow Plugs With A Multimeter?
Set your multimeter to the ohms (Ω) setting. Disconnect the glow plug and measure resistance between terminals. A typical reading is 0. 5 to 2 ohms. Higher or infinite readings indicate a faulty glow plug.
What Resistance Value Shows A Bad Glow Plug?
A glow plug resistance reading above 2 ohms or infinite indicates it is bad. Low or zero resistance suggests a short circuit. Proper resistance ensures the glow plug heats correctly to start the engine.
Can A Multimeter Detect Glow Plug Shorts?
Yes, a multimeter detects shorts by measuring resistance. Zero or near-zero ohms means a short. This condition prevents the glow plug from heating and requires replacement.
How Long Should A Glow Plug Last?
Glow plugs typically last between 60,000 to 100,000 miles. Regular testing helps catch failures early. Proper maintenance extends their lifespan and ensures reliable engine starts.
Conclusion
Testing glow plugs with a multimeter helps find faulty parts fast. It saves time and money by avoiding guesswork. Always check each plug carefully and compare readings. A steady hand and simple steps bring good results. Regular checks keep your engine running smooth and warm.
Don’t skip this easy test if your diesel engine struggles. Glow plugs matter more than you think. Keep tools ready and test often for best performance. Simple, quick, and effective – that’s how you maintain glow plugs well.