Measuring capacitance can sound complicated, but with the right approach and a good digital multimeter, it becomes a straightforward process. Whether you are a hobbyist working on electronics, a student learning about circuits, or a professional technician, the ability to test capacitors accurately is a key skill. Many people only use their multimeter for voltage or resistance, not realizing that capacitance measurement is just as important for troubleshooting and design. This article will guide you through everything you need to know about how to measure capacitance with a multimeter—from understanding the basics, choosing the right equipment, to interpreting results and avoiding mistakes. You will also discover some insights even experienced users sometimes miss.
What Is Capacitance And Why Measure It?
Capacitance is a measure of how much electric charge a component called a capacitor can store. The unit for capacitance is the farad (F), but most practical capacitors use microfarads (μF), nanofarads (nF), or picofarads (pF) because one farad is a very large value for most circuits.
Capacitors are used for smoothing power supplies, filtering signals, timing circuits, and many other applications. Measuring capacitance is important because:
- Capacitors degrade with time, heat, and stress
- Faulty or aged capacitors can cause devices to fail or behave unpredictably
- Correct values are needed for circuit performance
For example, a bad capacitor in a power supply can make a device refuse to start, while the wrong value in a timing circuit can cause it to run too fast or too slow. By measuring capacitance, you can spot these problems early.
Understanding How Multimeters Measure Capacitance
Many modern digital multimeters (DMMs) come with a special setting for measuring capacitance. This feature works by sending a small current to the capacitor and timing how quickly it charges up. The meter then calculates the capacitance based on the charge time.
Not all multimeters have this function. Some basic or older models only measure voltage, current, and resistance. If your meter has a capacitance symbol (often “Cx” or a small capacitor icon), it can measure capacitance directly. Otherwise, you will need a dedicated capacitance meter.
Some key points about multimeter capacitance measurement:
- It works best for capacitors in the range of 1 nF to 10,000 μF (varies by model)
- Very small or very large capacitors may give inaccurate readings
- The capacitor must be removed from the circuit for best accuracy

Credit: www.allumiax.com
Types Of Capacitors And Their Measurement Challenges
There are several common types of capacitors, each with their own advantages and challenges for testing. Knowing the type helps you set expectations and interpret measurements correctly.
| Capacitor Type | Common Value Range | Notes |
|---|---|---|
| Electrolytic | 1 μF – 10,000 μF | Polarity sensitive, often used in power supplies |
| Ceramic | 1 pF – 1 μF | Non-polarized, used for signal filtering and bypass |
| Film | 1 nF – 10 μF | Stable, non-polarized, common in audio circuits |
| Tantalum | 0.1 μF – 100 μF | Small size, polarized, sensitive to over-voltage |
Electrolytic capacitors, for example, often fail with age and can show much lower capacitance than marked. Ceramic capacitors are generally reliable, but their small values can be tricky for some meters to measure.
Tools You Need For Capacitance Measurement
Before you begin, make sure you have the right tools. Measuring capacitance with a multimeter requires:
- Digital Multimeter with Capacitance Measurement: Check your meter for the “F” symbol, “Cx,” or a dedicated capacitance range.
- Test Leads or Alligator Clips: For stable connections, especially with small or surface-mount capacitors.
- Screwdriver or Soldering Iron: If you need to remove capacitors from a circuit board.
- Discharge Tool: A resistor or special tool to safely discharge capacitors before handling.
- Safety Glasses: For personal protection, especially with larger capacitors.
Some people try to measure capacitors while they are still in the circuit, but this can give false readings due to parallel components. It’s best to test them “out of circuit” for accuracy.

Credit: www.youtube.com
Safety Precautions Before Measuring
Capacitors, especially those in power supplies and motors, can hold a dangerous charge long after power is removed. Before measuring:
- Always disconnect power to the circuit and wait for a few minutes.
- Discharge the capacitor by connecting a resistor (e.g., 10kΩ, 1W) across its leads for several seconds. Never short the leads directly with a wire.
- Wear safety glasses and avoid touching capacitor leads with bare hands.
Electrolytic capacitors above 100 μF and 25V can give a strong shock if not discharged. Don’t skip this step.
Step-by-step Guide: Measuring Capacitance With A Multimeter
Now, let’s walk through the process for how to measure capacitance with a multimeter, step by step.
1. Remove Power And Discharge The Capacitor
Turn off the device and unplug it. Use a resistor to safely discharge the capacitor. Confirm with the multimeter (set to DC volts) that no voltage remains across the terminals.
2. Remove The Capacitor From The Circuit (if Possible)
For best accuracy, desolder one or both leads of the capacitor from the circuit board. Measuring in-circuit can cause errors due to other paths for current.
3. Set The Multimeter To Capacitance Mode
Turn the dial to the capacitance setting (look for the “F” symbol or a small capacitor icon). If your meter has multiple capacitance ranges, choose the one closest to the expected value.
4. Connect The Test Leads
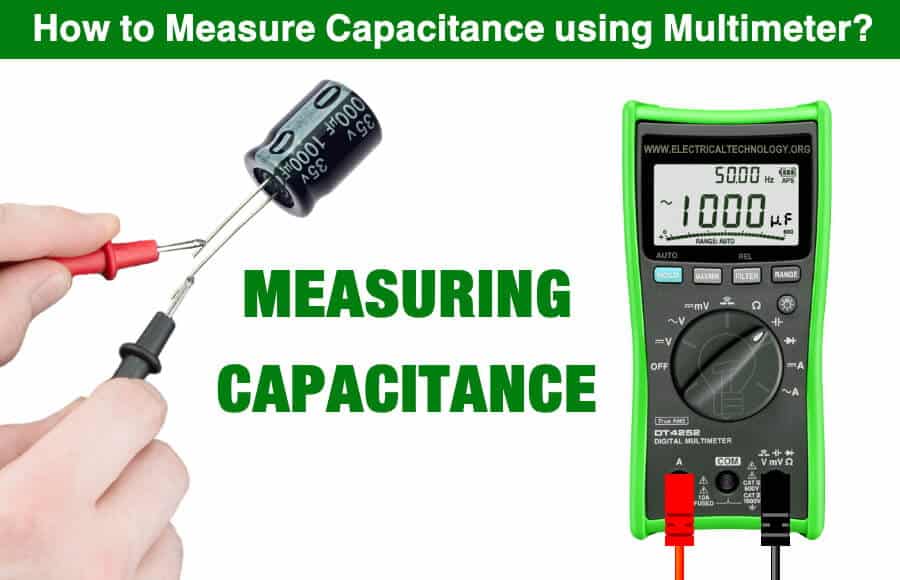
Insert the red lead into the “+” or “VΩmA” jack, and the black lead into “COM.” Some meters have a dedicated “Cx” socket—use this if available. Attach the leads to the capacitor terminals. For polarized capacitors (like electrolytic), connect red to positive and black to negative.
5. Read The Display
The value will show in farads (F), microfarads (μF), nanofarads (nF), or picofarads (pF), depending on the meter and the capacitor’s value. Wait a few seconds for the reading to stabilize.
6. Compare With The Marked Value
Check the capacitor’s body for its rated capacitance. Compare this to the measured value. A good capacitor should be within ±10% or ±20% of its marked value, depending on its tolerance rating.
7. Reinstall Or Replace The Capacitor
If the reading is far off, the capacitor may be faulty. Replace it with a new one of the same value and voltage rating.
Example: Measuring A 100 Μf Electrolytic Capacitor
Suppose you have a 100 μF, 25V electrolytic capacitor removed from a power supply. After discharging, you connect the leads to your multimeter set to the 200 μF range. The display shows “97. 5. ” This is within 2. 5% of the marked value, so the capacitor is good.
If the meter showed “35. 2,” that’s a sign the capacitor has degraded and should be replaced.
Troubleshooting: What To Do If The Reading Seems Wrong
Sometimes, your measurement may be much higher or lower than expected, or the meter may not show any value at all. Here are some common causes and fixes:
- Capacitor still in circuit: Try removing it and testing again.
- Wrong range selected: Switch to a higher or lower range.
- Leads not making good contact: Clean leads or use alligator clips.
- Capacitor not fully discharged: Discharge again and retest.
- Meter not zeroed: Some meters need you to short the leads and press “REL” or “ZERO” before measuring small values.
- Capacitor is leaky or shorted: Meter may read “0” or a very low value.
Special Cases: Measuring Small And Large Capacitors
Measuring Small Value Capacitors (pf Or Nf Range)
Very small capacitors, like those used in RF circuits, are difficult to measure with general-purpose meters. Stray capacitance from the test leads can be larger than the capacitor itself! To minimize errors:
- Use the shortest possible leads
- Zero out the meter before testing
- Test several times and average the result
Some high-precision meters have a dedicated socket for small capacitors and let you subtract lead capacitance.
Measuring Large Value Capacitors (over 10,000 Μf)
Electrolytic capacitors in power supplies can be very large (e. g. , 22,000 μF). Some multimeters cannot measure values this high. If you try, the meter may show “OL” (overload) or give incorrect readings. Use a meter rated for high capacitance or a dedicated ESR meter for these parts.
Using Multimeter Data Sheets For Accurate Measurement
Not all meters are equally accurate for capacitance. Check your multimeter’s datasheet for:
- Measurement range: What values can it test?
- Accuracy: Usually shown as ±% of reading plus a fixed value
- Test frequency: Some meters use 100 Hz, others 1 kHz—this can affect results for certain capacitor types
For example, a popular digital multimeter might specify: “Capacitance: 10 nF–10,000 μF, accuracy ±2% + 5 digits.” If your capacitor is outside this range, results may not be reliable.
Capacitance Measurement: Multimeter Vs. Capacitance Meter
You might wonder if you should use a dedicated capacitance meter instead of a multimeter. Here’s how they compare:
| Feature | Multimeter | Capacitance Meter |
|---|---|---|
| Functions | Voltage, current, resistance, some with capacitance | Capacitance (sometimes ESR, leakage, etc.) |
| Accuracy | Good for general use | Higher, especially for small values |
| Price | Often cheaper, multipurpose | Can be more expensive, single-purpose |
| Ease of Use | Simple for most jobs | Better for advanced testing |
For most DIY and repair work, a multimeter with capacitance mode is enough. But for critical audio, radio, or research applications, a dedicated meter is better.
Interpreting Results: Tolerance And Aging
No capacitor is perfect. Every part has a tolerance, which tells you how much the actual value can differ from the marked value. Common tolerances are ±10% (marked “K”) or ±20% (“M”). For example, a 100 μF ±20% capacitor can actually be anywhere from 80 to 120 μF and still be “good.”
Capacitors also age over time:
- Electrolytic capacitors dry out and lose capacity, especially after 5–10 years
- Tantalum and film capacitors are more stable but can still drift a few percent per decade
If your measured value is slightly outside the tolerance but the device works well, it may be okay to keep using the capacitor. But if it’s much lower, replace it.
Advanced Testing: Esr And Leakage
A regular multimeter cannot measure Equivalent Series Resistance (ESR) or leakage current, which are also important for capacitor health. A capacitor can show the correct capacitance but still be “bad” due to high ESR or leakage. For these tests, you need a special ESR meter.
High ESR can cause power supply ripple, while high leakage makes timing circuits fail. If in doubt, test suspect capacitors with an ESR meter or replace them.
Practical Tips For Accurate Capacitance Measurement
Getting reliable readings is not just about following the steps. Here are some practical tips:
- Always discharge capacitors before testing—never skip this step!
- Label removed capacitors so you don’t lose track of their placement.
- Zero or calibrate your meter before testing small values.
- Compare with a known good capacitor to check your meter.
- Keep your test leads clean—dirt and oxidation add resistance and capacitance.
- Avoid testing in humid or dusty environments, which can affect readings.
Non-obvious insight: Even the way you hold the capacitor can affect tiny value measurements, as your body adds stray capacitance! For best results, use clips and don’t touch the leads.
Common Mistakes And How To Avoid Them
Many beginners make the same errors when measuring capacitance. Here’s what to watch out for:
- Measuring in-circuit: Other components can “hide” or add to the real value.
- Testing charged capacitors: This can damage your meter or give false readings.
- Ignoring tolerance: Expecting the exact marked value is unrealistic.
- Selecting the wrong meter range: Leads to overload or zero readings.
- Not cleaning leads: Dirty connections cause unreliable results.
Another non-obvious tip: Some capacitors (especially ceramics) can change value with temperature. If you’re troubleshooting a device that fails when hot or cold, try measuring the capacitor in both states.
When To Replace A Capacitor
A capacitor should be replaced if:
- The measured value is much lower than the marked value (e.g., less than 80% of rated)
- The capacitor shows visible signs of damage (bulging, leaking, corroded leads)
- The device still malfunctions after other repairs
Do not reuse capacitors that have failed these tests, even if they sometimes give a “normal” reading.
Credit: www.electricaltechnology.org
Real-world Example: Tv Power Supply Repair
Suppose a flat-screen TV won’t turn on, and you suspect the power supply. You find several large electrolytic capacitors. After discharging and removing one, you measure it with your multimeter. It’s marked 470 μF, 35V, but your meter reads only 135 μF.
This is a classic sign of a failed capacitor. Replacing it fixes the TV.
Summary Table: Capacitance Measurement Steps
Here’s a quick reference for the steps:
| Step | Action | Why It Matters |
|---|---|---|
| 1 | Disconnect power, discharge capacitor | Safety, protect meter |
| 2 | Remove capacitor from circuit | Accuracy |
| 3 | Set meter to capacitance mode | Correct measurement |
| 4 | Connect leads to capacitor | Stable reading |
| 5 | Read and compare value | Diagnose health |
| 6 | Reinstall or replace | Restore function |
Frequently Asked Questions
What If My Multimeter Doesn’t Have A Capacitance Mode?
You cannot measure capacitance directly with a standard multimeter that lacks this feature. You will need a dedicated capacitance meter or consider upgrading your multimeter to a model with capacitance measurement.
Can I Test A Capacitor Without Removing It From The Circuit?
It’s possible, but not recommended. Other components (like resistors or parallel capacitors) can affect the reading and make it inaccurate. For best results, remove at least one leg of the capacitor from the circuit before testing.
How Do I Know If A Capacitor Is “bad” Even If The Capacitance Is Correct?
A capacitor can still be faulty due to high ESR (resistance inside the capacitor) or leakage. This is common with electrolytic capacitors. If you suspect a problem, use an ESR meter or replace the capacitor as a test.
What Does “ol” Mean On My Meter When Measuring Capacitance?
“OL” stands for “overload” or “out of limits. ” This means the value is too high for your meter to measure, or the capacitor is open (not conducting). Try a lower value capacitor or check the meter’s range.
Where Can I Learn More About Capacitor Testing?
For more in-depth knowledge about capacitor types, testing, and troubleshooting, visit the official Wikipedia Capacitor Page which offers detailed explanations and background.
Whether you are a beginner or experienced with electronics, mastering how to measure capacitance with a multimeter will help you keep your devices running smoothly, avoid guesswork, and gain confidence in your repair skills. With careful testing and a little practice, even difficult faults become much easier to find and fix.